

There’s something about soft pink petals drifting through the air that makes a birthday feel like it belongs in a storybook. If you’ve been saving cherry blossom birthday theme ideas for months, scrolling through blush pink table settings and paper petal walls late at night, you already know the pull. This theme has a way of turning a plain backyard or living room into something that feels gentle, romantic, and a little magical, without needing a huge budget or a professional florist on speed dial.
The tricky part is turning all that inspiration into something you can actually build in a weekend. A lot of blossom party ideas online look stunning but skip the how. This list fixes that. Every idea here comes with a real way to pull it off, from paper flower branches you can make with your kids to a dessert table that photographs beautifully in any light.
Whether you’re planning a first birthday or a tenth, these ideas work for small gatherings and big backyard parties alike. Grab your pink and white supplies, because your spring celebration is about to look like it walked straight out of a dream.
1. Cherry Blossom Balloon Arch Entrance
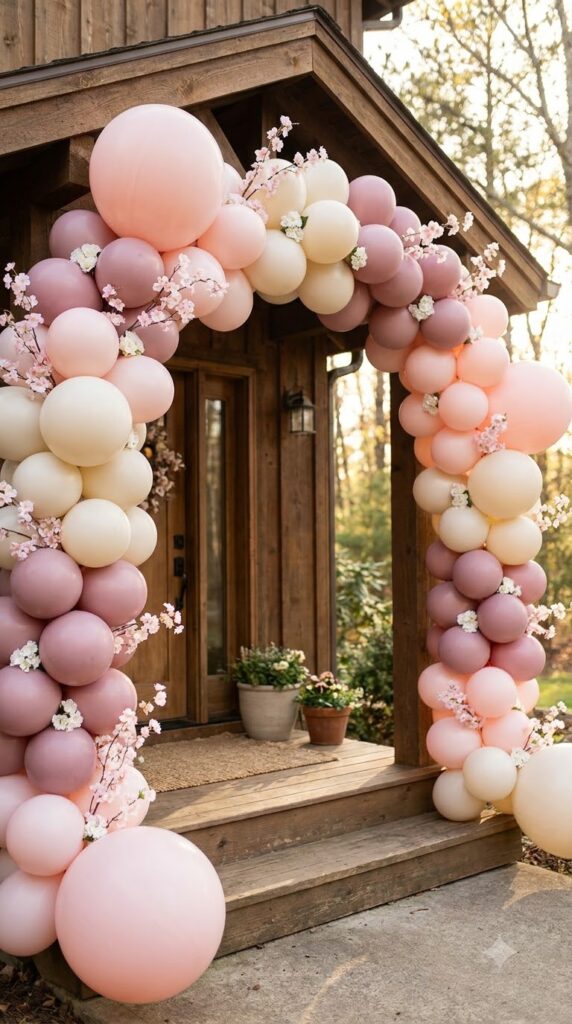
The first thing guests see should feel like a little gasp moment. A balloon arch built from blush, ivory, and soft mauve balloons, with a few paper cherry blossom branches tucked into the gaps, turns a doorway or porch into an entrance guests want to stop and photograph. Skip the solid color rule. Mixing three shades of pink with white gives the arch depth instead of looking flat.
Add real or silk blossom stems near the base so the arch feels grounded instead of floating in space.
How to pull it off: Use a balloon arch strip kit, alternate 5-inch and 11-inch balloons for texture, and tuck faux blossom branches through the gaps every few balloons.
2. Paper Blossom Dessert Table Backdrop
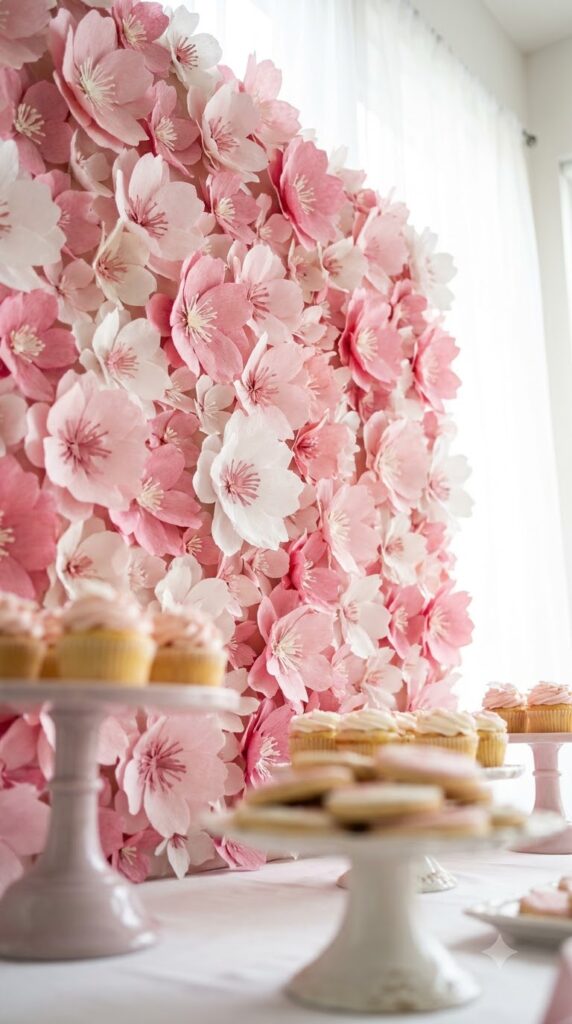
A backdrop does more work than any single dessert on the table. Hang a wall of paper cherry blossoms behind your dessert spread and suddenly every cupcake, cookie, and cake photo looks professionally styled. You don’t need real flowers for this one. Paper blossoms in three shades of pink, glued onto a mesh or fishing line grid, hold their shape for hours and won’t wilt under party lights.
This is one of those setups that takes an afternoon but pays off in every photo taken that day.
How to pull it off: Use crepe paper or tissue paper blossoms glued to a fishing line grid, or cardboard cutouts covered in petals, and hang the whole panel with removable hooks.
💡 Quick Tip
Cluster your paper blossoms in loose groups of five to seven instead of spacing them evenly. Real branches never grow in perfect rows, and neither should your backdrop.
3. Blossom Branch Centerpiece
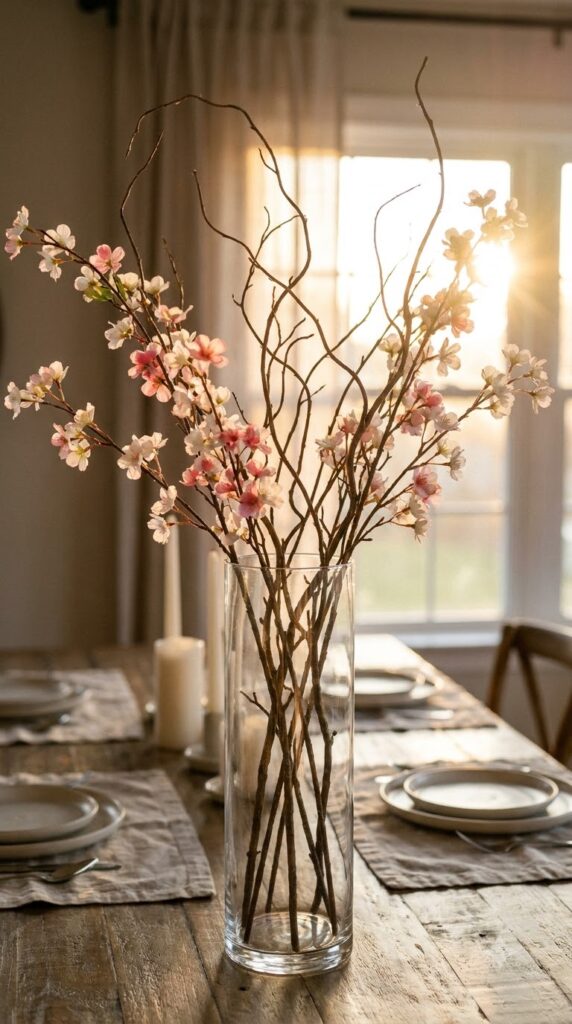
Start with three bare branches from your yard, or a bundle of birch branches from a craft store. Wrap the base in floral tape, place them in a tall clear vase filled with a few inches of water and pebbles, then clip on faux cherry blossom stems until the branch looks full and slightly lopsided on purpose.
- Vase height: at least 14 inches so it clears the table when guests are seated
- Branch count: three to five works better than one thick branch
- Blossom stems: tuck them in at different heights, not evenly spaced
How to pull it off: Bend the branches slightly before placing them in the vase so they arch outward instead of standing stiff and straight.
A single plain vase with no branches, sitting empty next to the cake.
A tall, arranged branch full of blossoms, standing as the table’s focal point.
4. Make-Your-Own Paper Blossom Craft Station
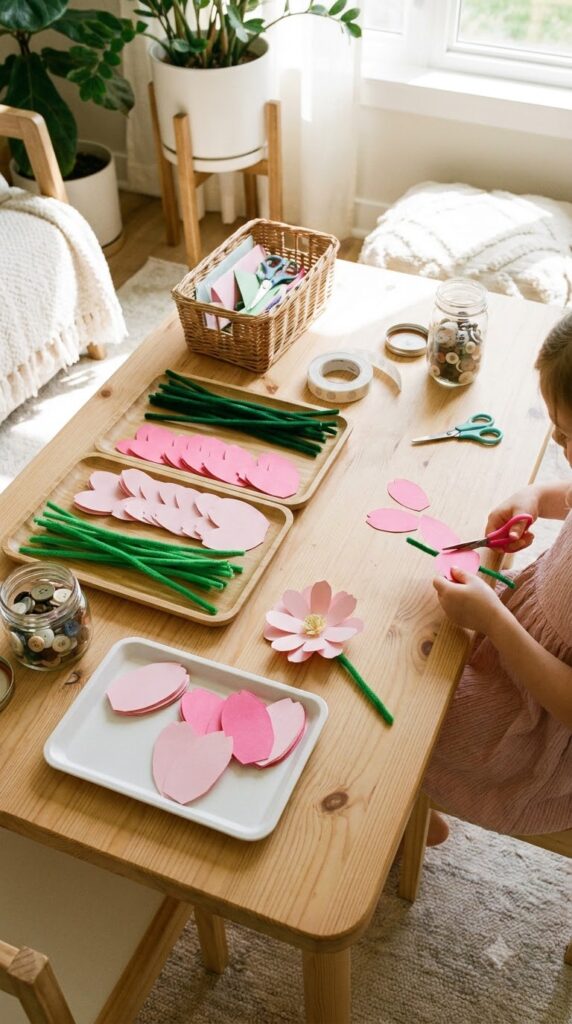
Kids get restless waiting for cake, and a craft station solves that before it becomes a problem. Set up a small table with pre-cut petal shapes, pipe cleaners, and glue dots so kids can build their own paper cherry blossom to take home or pin to a growing tree on the wall.
Keep the instructions to three steps max, or the youngest guests will lose interest halfway through.
How to pull it off: Pre-cut petals for kids under six, and let kids ages seven and up cut their own for a bit more hands-on fun.
What to grab first
5. Blush Macaron Tower
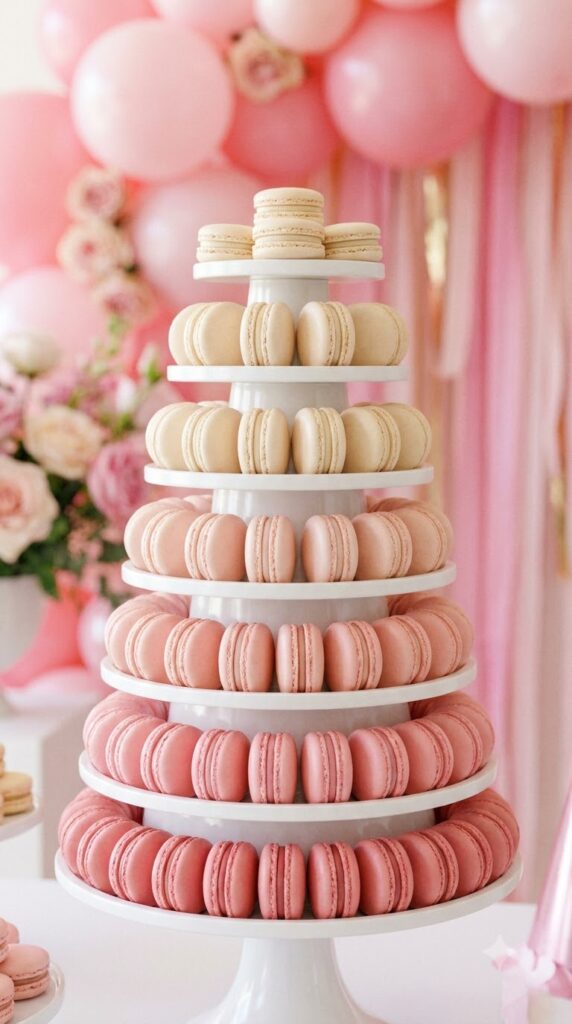
The dessert table always draws a crowd near the end of the party, right when everyone’s looking for something to photograph before they leave. A tiered macaron tower in three shades of pink and a soft cream, arranged with the palest color on top, gives that moment a clear focal point without competing with the birthday cake.
You can order these from a local bakery or make a simplified two-flavor batch at home if you have a weekend to spare.
How to pull it off: Use a plain white tiered stand so the macarons stay the star of the display instead of the stand.
6. Cherry Blossom Cookie Favors
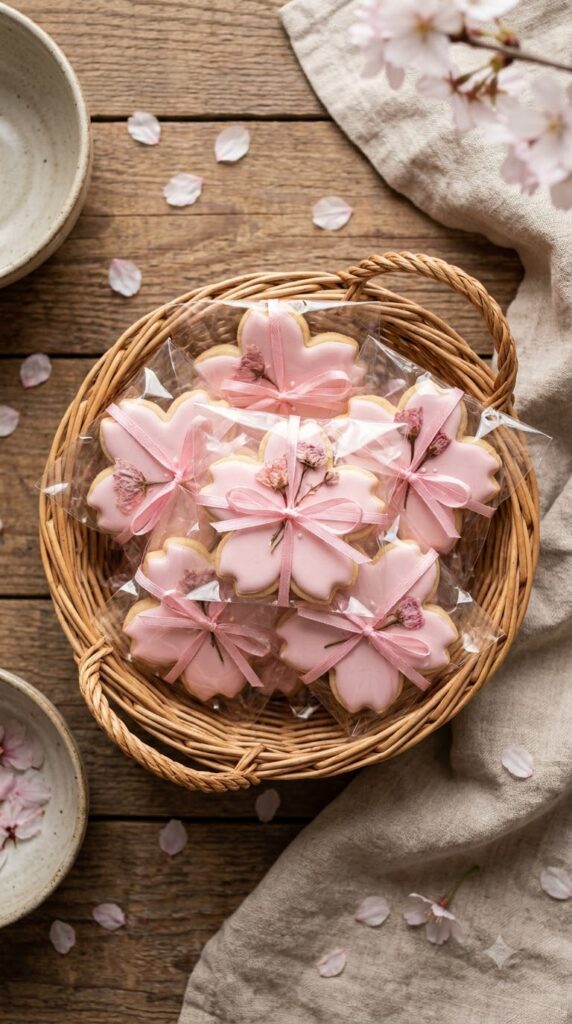
A lot of hosts assume party favors need to be a whole gift bag of trinkets. They don’t. A single cherry blossom shaped sugar cookie, wrapped and tied with a ribbon, feels more thoughtful than a bag of plastic toys nobody keeps.
- Bake and cool blossom or flower shaped sugar cookies
- Pipe a simple pink and white outline, no need for detailed flooding
- Wrap in a clear bag and tie with a thin ribbon that matches your palette
How to pull it off: Order from a local baker if timing is tight. Most can manage a simple blossom design with about two weeks of notice.
Bake and cool blossom or flower shaped sugar cookies.
Pipe a simple pink and white outline, no full flooding needed.
Wrap in a clear bag and tie with ribbon that matches your palette.
7. Blossom Petal Welcome Sign
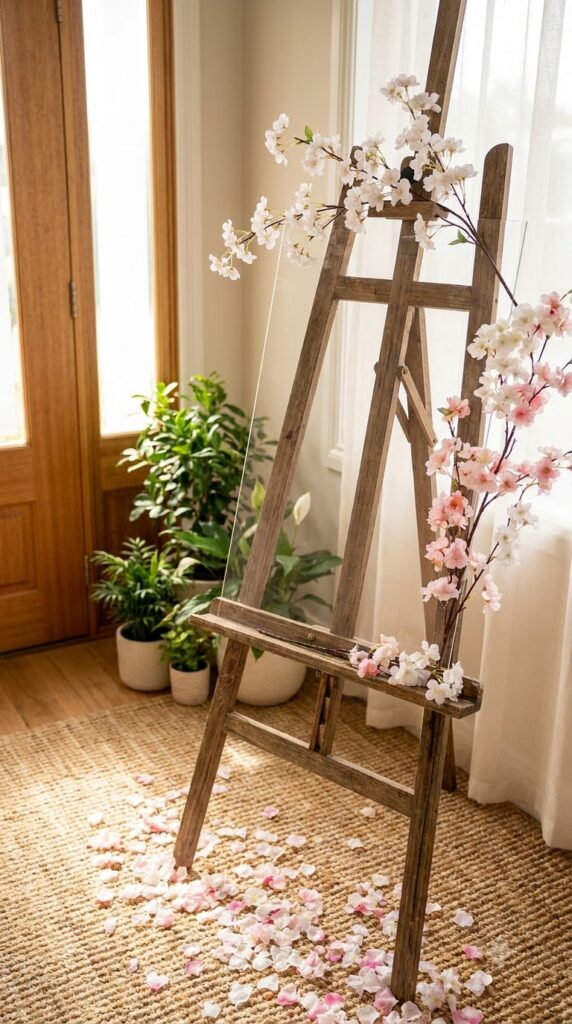
A welcome sign sets the tone before guests even step inside. Compare a plain printed sign propped on an easel to one surrounded by a small arrangement of faux blossom stems and a scattering of petals at its base. The second version photographs better every time, and it costs almost nothing extra since you likely already have leftover blossoms from other stations.
Keep the wording short. Guests read signs in passing, not in full paragraphs.
How to pull it off: Use a chalkboard or acrylic sign instead of paper so you can wipe it clean and reuse it for the next party.
Rest the sign at an angle against branches or an easel.
Add petals loosely scattered at the base.
Laying the sign flat where guests can’t see it walking in.
Overcrowding it with too many extra props.
8. DIY Photo Backdrop Wall
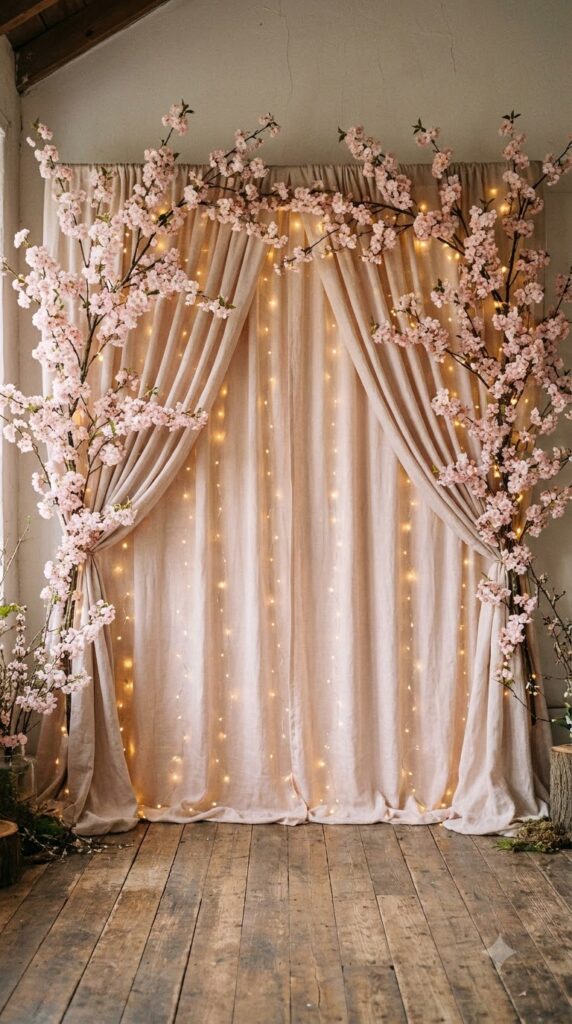
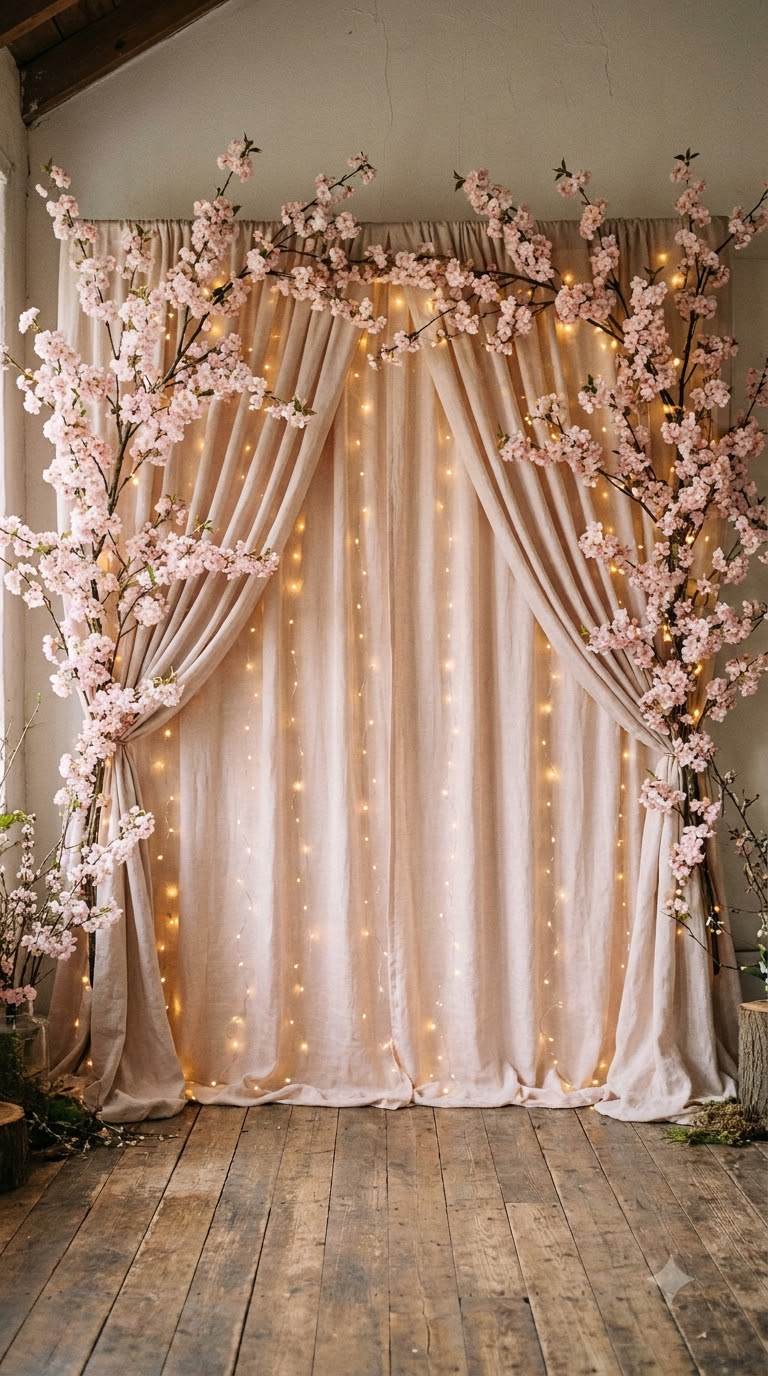
This is the spot where almost every guest ends up taking a picture, so it’s worth the extra effort. Combine a few branches, a strand of warm fairy lights, and a soft fabric backdrop in blush or ivory for a wall that looks intentional instead of thrown together at the last minute.
Fairy lights work whether the party is indoors with dim lighting or outdoors after sunset, which makes this setup flexible for almost any party time.
How to pull it off: Hang the backdrop fabric slightly loose rather than pulled tight. It catches light better in photos.
| Fabric Backdrop | Branch Only Backdrop |
|---|---|
| Setup takes about an hour with a curtain rod or PVC frame. | Setup takes 20 to 30 minutes with a simple wall arrangement. |
| Best for a dedicated indoor photo corner. | Best for outdoor parties near an existing wall or fence. |
9. Blossom Table Runner And Place Settings
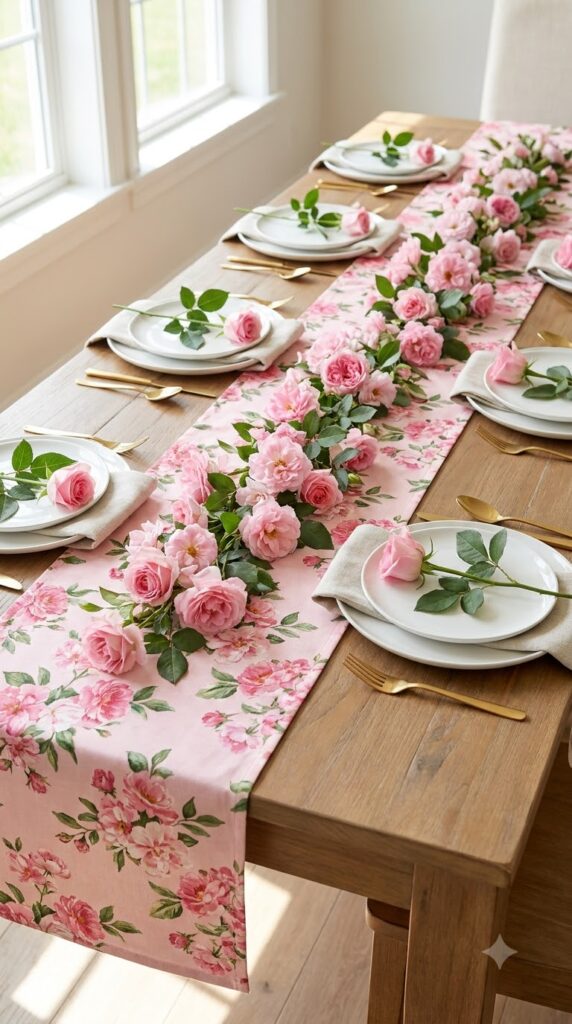
One simple rule keeps a blossom themed table from looking cluttered: pick one pattern for the runner and keep everything else solid. A pink and white floral runner down the center, paired with plain white or blush plates, lets the pattern do the visual work instead of competing with patterned napkins, cups, and everything else.
Add a single loose blossom stem across each place setting for a detail guests will notice without you saying a word.
How to pull it off: Tuck a small name card under each blossom stem so it doubles as a place card.
One pattern, one focal point. Let the blossom runner shine and keep the rest of the table simple.
10. Blossom Fizz Drink Station
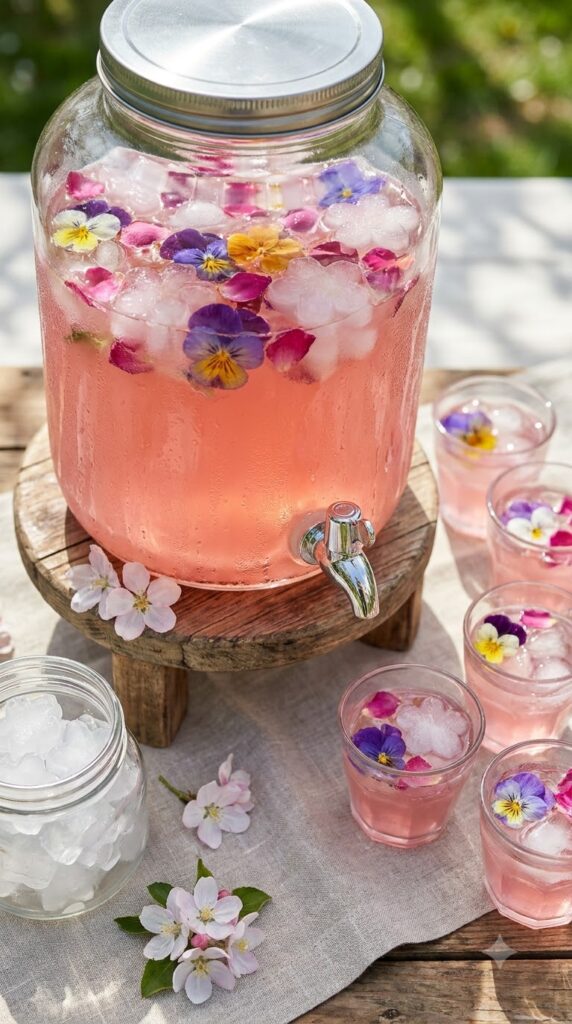
Kids gravitate toward the drink station more than almost any other part of a party, probably because it’s the one thing they’re allowed to pour themselves. A simple pink lemonade or sparkling “blossom fizz” made with cranberry juice and lemon lime soda, served from a clear glass dispenser with floating edible flowers or blossom shaped ice cubes, turns a basic drink station into a photo spot.
Label it with a small handwritten sign so guests know what they’re pouring.
How to pull it off: Freeze edible flowers or petals into ice cube trays the night before, so they’re ready to float in the drink first thing.
💡 Quick Tip
Use a wide mouth dispenser instead of a narrow one. Blossom ice cubes and floating petals get stuck in narrow necks and stop the flow.
11. Cherry Blossom Cupcake Tower
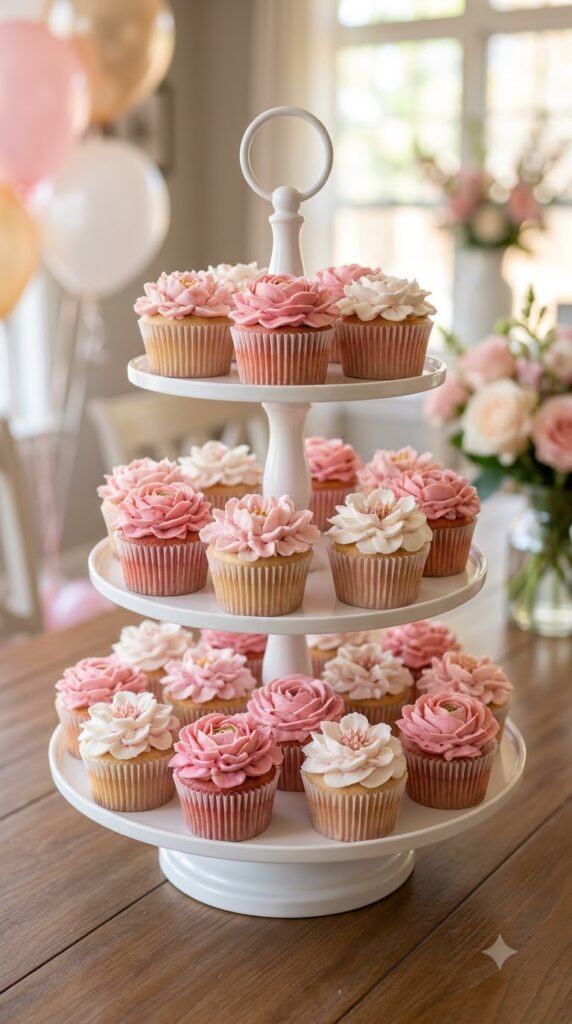
Build a cupcake tower using a plain white or gold stand, then top each cupcake with a small buttercream blossom or a fresh edible flower instead of sprinkles. Keep the frosting palette to two shades of pink plus white so the tower reads as cohesive instead of busy.
Place the tallest, most detailed cupcakes at eye level in the middle of the display, since that’s where guests’ eyes land first.
How to pull it off: Pipe buttercream blossoms ahead of time and freeze them, then set them on cupcakes the morning of the party.
12. Spring Picnic Seating Area
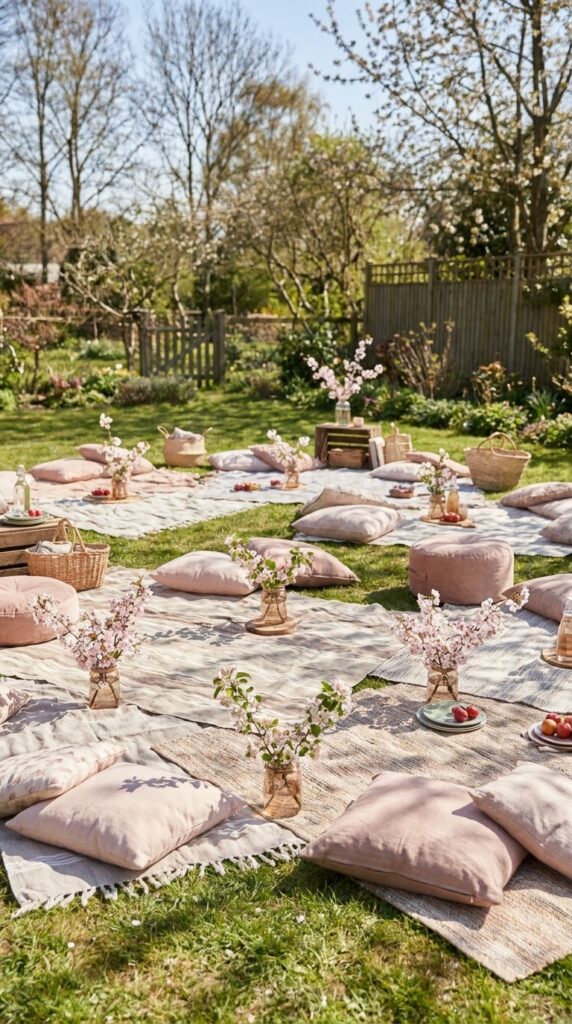
A common mistake is packing every guest around one long table, which gets loud and cramped fast. Instead, scatter a few low picnic blankets or floor cushions in blush and cream around the yard, with small clusters of faux blossom branches marking each seating area.
It breaks the party into smaller, calmer conversation pockets, which especially helps with younger guests who don’t sit still for long stretches at a formal table.
How to pull it off: Use outdoor rated cushions if there’s any chance of dew or a damp lawn.
- ▸Two to three small seating clusters instead of one long table.
- ▸Cushions in blush, cream, and one deeper mauve for contrast.
- ▸A small blossom branch or vase marking each cluster.
13. Blossom Petal Confetti Toss
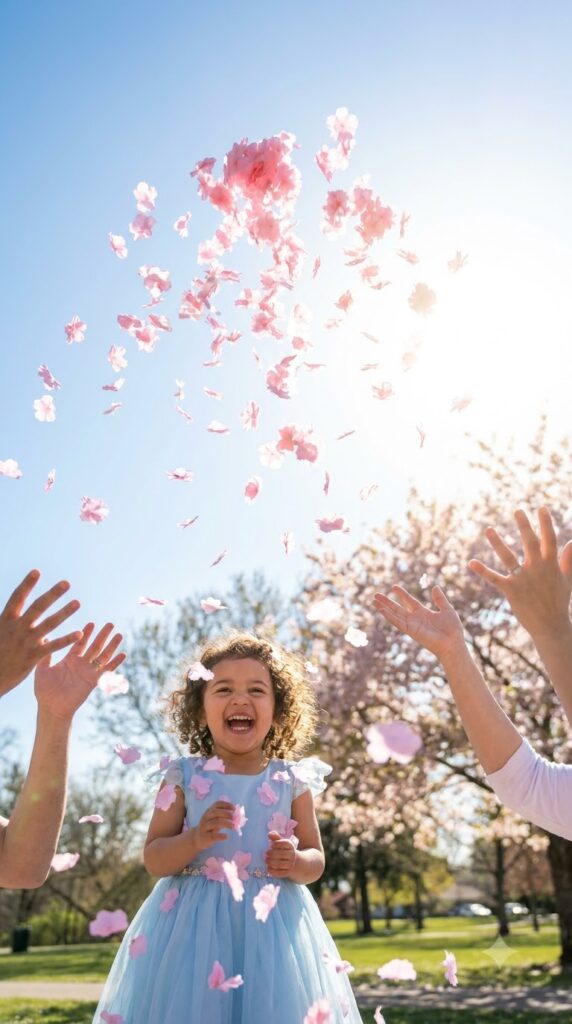
A birthday moment can pass by quietly if there’s nothing marking it as special. A petal toss, where guests gently toss silk cherry blossom petals over the birthday child during the cake moment or a group photo, gives everyone something to do with their hands and creates a burst of color in every picture.
Buy silk petals in bulk. They’re reusable for next year and won’t stain clothing the way real petals sometimes can.
How to pull it off: Hand out small petal cones or paper cups so guests aren’t fumbling with loose petals right before the moment happens.
A quiet cake moment with everyone just standing and watching.
A petal toss moment full of movement, color, and candid smiles.
14. Personalized Blossom Birthday Banner
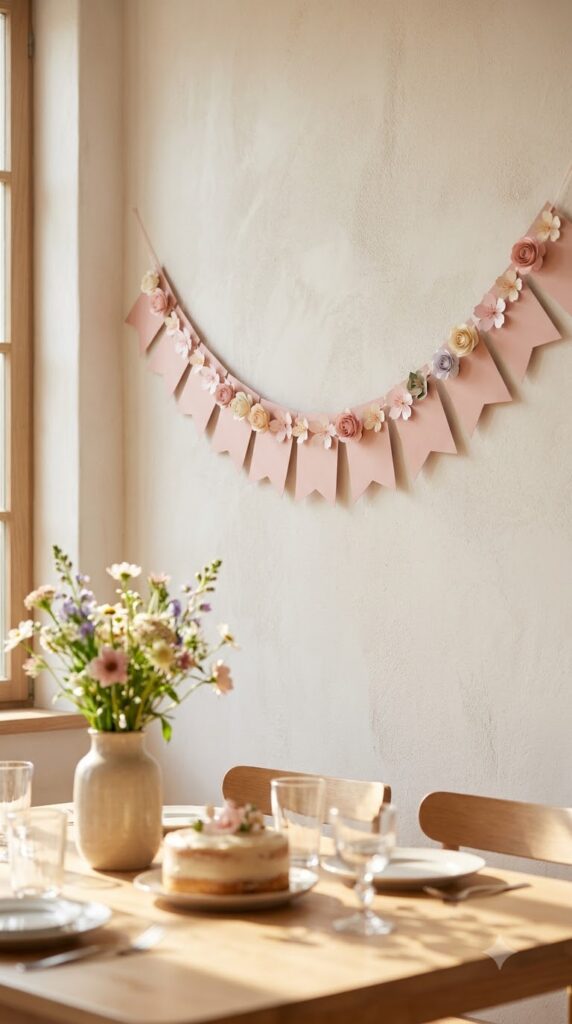
Letters cut from blush cardstock, each one dotted with a few tiny paper blossoms glued at the corners, turn a basic happy birthday banner into something that matches the rest of the party instead of looking store bought. Hang it slightly loose so it dips gently in the middle rather than pulled tight in a straight line.
That small sag is what makes it look handmade instead of stiff.
How to pull it off: Use a paper cutter for even letters if your handwriting or scissor skills aren’t steady.
What to grab first
15. Floral Crown Station
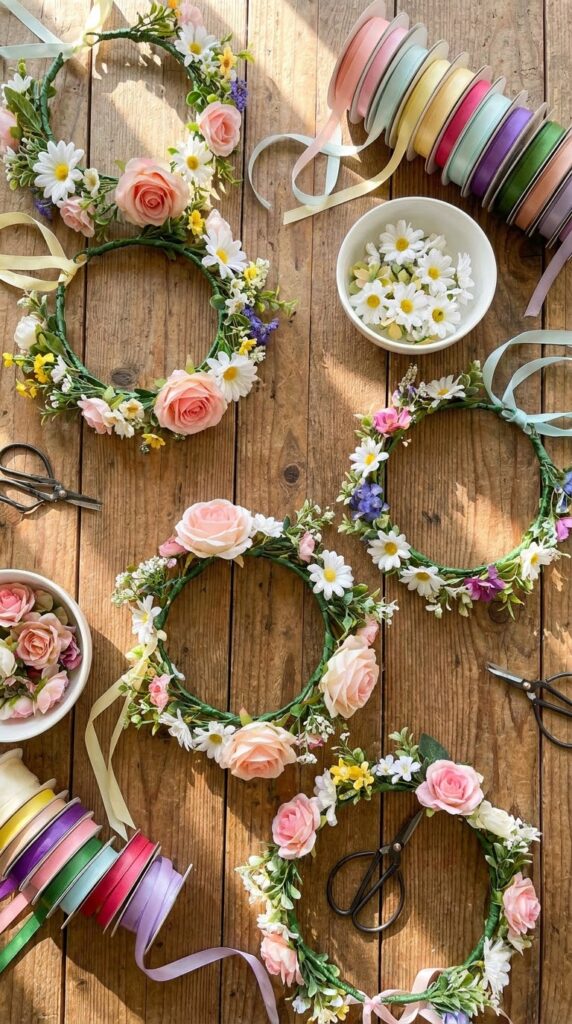
Little guests love wearing something that makes them feel dressed up for the occasion, and a floral crown does exactly that without needing real flowers that wilt in an hour. Pre-make a batch of foam or wire crowns wrapped in ribbon, with faux blossom stems already attached, so kids can grab one on arrival instead of waiting for a craft to dry.
This works especially well for outdoor parties, where crowns double as a bit of sun coverage too.
How to pull it off: Make the crowns adjustable with a small bit of elastic so they fit a range of head sizes.
16. Cherry Blossom Cascade Cake
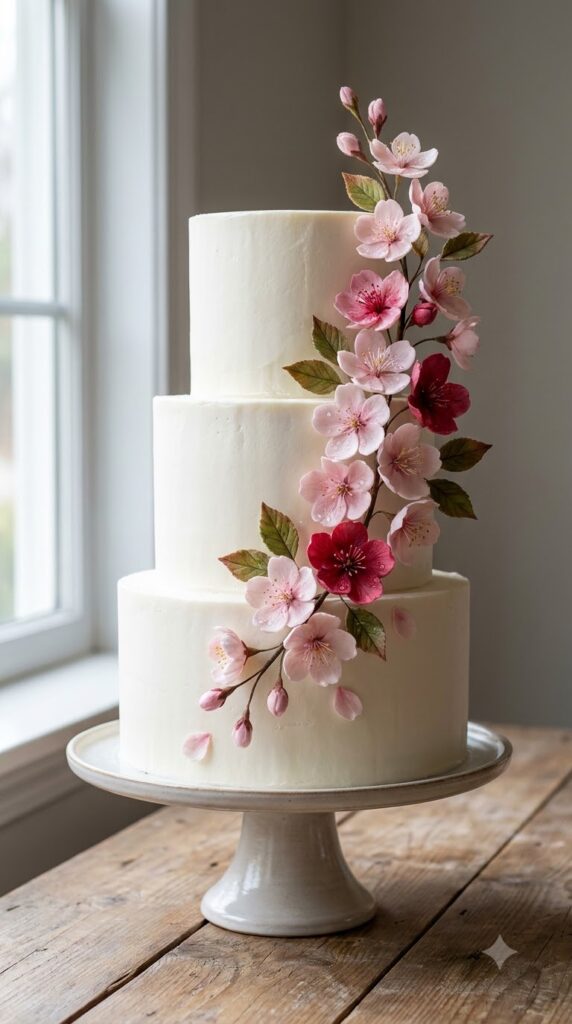
People often think a blossom cascade cake needs a professional decorator, but a simple buttercream cake with a diagonal trail of sugar or fondant blossoms cascading down one side is more forgiving than it looks. The blossoms hide small frosting imperfections instead of exposing them, which takes the pressure off getting a perfectly smooth cake.
Start the cascade heavy at the top and let it taper to just a few scattered blossoms near the base.
How to pull it off: Buy premade gum paste blossoms online if cake decorating isn’t your strength, they hold up for weeks in the freezer.
Start the cascade heavy at the top and taper down.
Use two to three shades of pink for depth.
Spacing blossoms in a perfectly even line.
Covering the whole cake so there’s no plain surface to rest on.
17. Outdoor Blossom Tree Focal Point
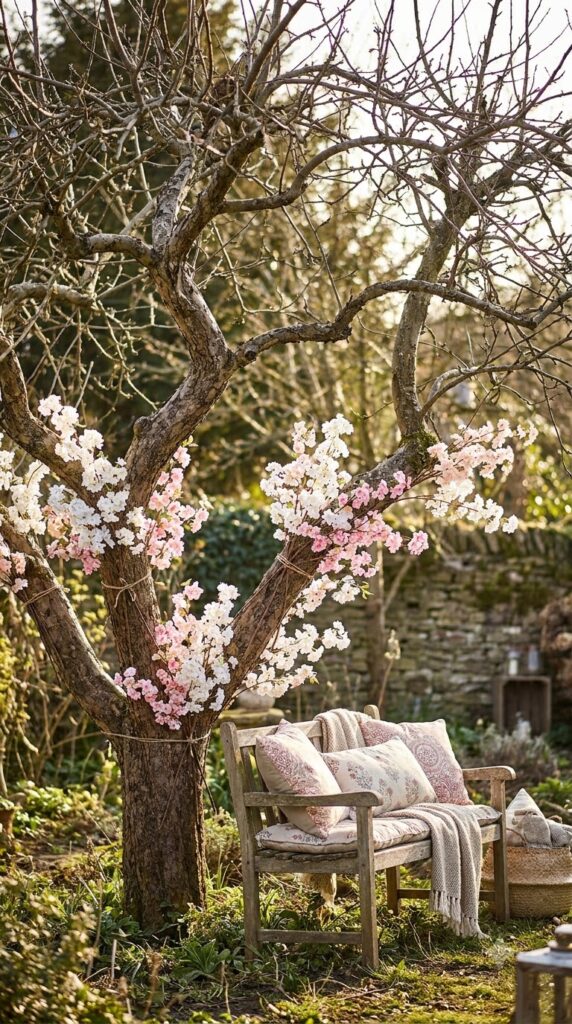
If there’s a bare tree in the yard, it can become the party’s biggest visual moment with a little effort. Tie small clusters of faux blossom branches or ribbon streamers along the lower limbs where guests will actually notice them, then add a small bench or a few floor cushions underneath for a natural photo spot.
- Tie faux blossom clusters to lower, visible branches
- Add fairy lights for evening parties
- Place a bench, chair, or cushions underneath for photos
How to pull it off: Tie branches on with garden wire wrapped in ribbon so the wire itself doesn’t show up in photos.
Tie faux blossom clusters to lower, visible branches.
Add fairy lights if the party runs into the evening.
Place a bench, chair, or cushions underneath for photos.
18. Blossom Sticker Party Favor Bags
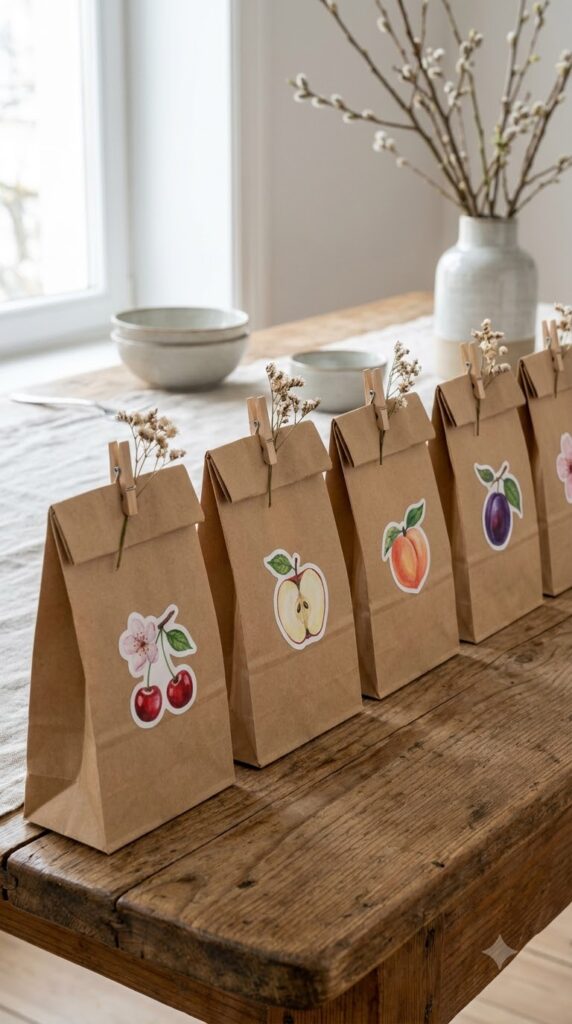
A plain brown paper bag and the same bag with a single blossom sticker and a folded top look like they belong to two completely different parties. The sticker version costs a few cents more per bag but reads as intentional instead of like an afterthought grabbed on the way out the door.
Fill favor bags with something small and useful, like a mini bag of pink candy or a tiny succulent, rather than plastic toys that end up in a drawer.
How to pull it off: Fold the bag top down twice and secure with washi tape for a cleaner finish than a staple.
| Plain Bag | Blossom Sticker Bag |
|---|---|
| Cost: a few cents per bag. | Cost: a few cents more per bag. |
| Guest impression: forgettable. | Guest impression: feels intentional and thoughtful. |
19. Nighttime Blossom Lantern Display
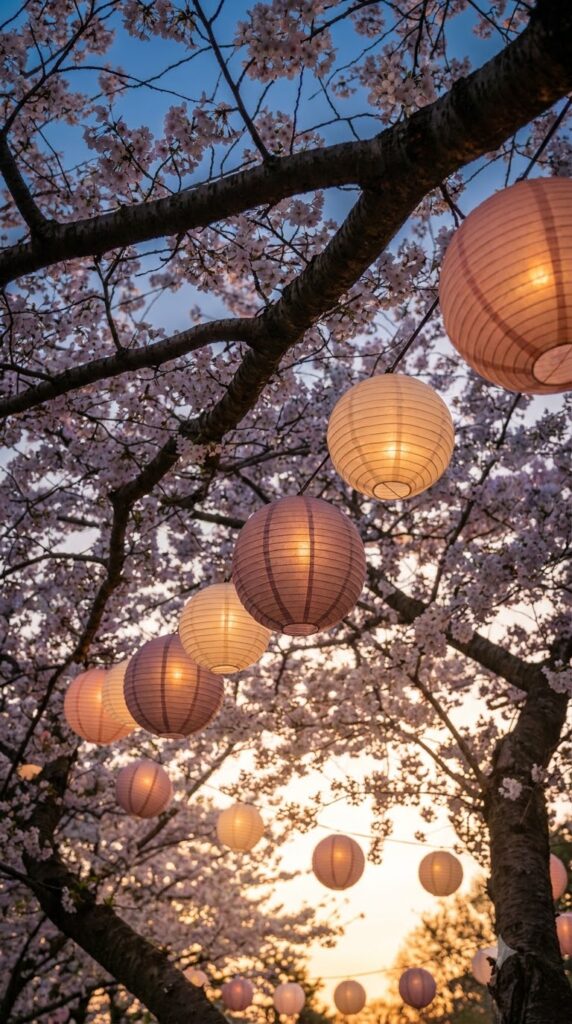
Evening parties have a way of feeling extra magical once the sun starts going down, and a few paper lanterns strung between branches or along a fence line make that transition feel planned instead of accidental. Choose lanterns in blush, white, and one deeper mauve, mixed with faux blossom garland, and turn them on right as golden hour starts.
It’s a small addition that makes every photo taken after 6pm look softer and warmer.
How to pull it off: Use battery LED lanterns instead of candles if kids will be moving around nearby.
Lanterns turned on before it’s fully dark catch the golden hour light and make every evening photo warmer.
Bring It All Together
A cherry blossom birthday theme comes together in layers, not one big purchase. A few branches here, a paper garland there, a simple drink station that photographs well, and suddenly the whole space feels like it belongs in a spring dream. You don’t need every idea on this list. Pick five or six that fit your space and your budget, and let those carry the theme through the whole party.
The best part is how flexible it all is, indoors or outdoors, for a first birthday or a tenth. Save this list for the next time you’re planning a soft, pretty party, so it’s ready whenever spring rolls around again.