

Your kid has been talking about cricket since breakfast, and now the birthday is a week away. You open Pinterest looking for cricket theme birthday party decoration ideas and every board looks like it needs a warehouse of props and a full weekend of setup. That is not what most parents have time for.
Here is the honest part. A cricket party does not need real stumps shipped in or a rented scoreboard. It needs a handful of smart choices that make the room instantly read as a stadium, plus a couple of spots built for photos, because that is where the memories actually get made.
This list is built for a home setup. Every idea uses supplies you can find at a craft store, a party shop, or your own garage, and each one comes with the quick version of how to pull it off. Pick five or six that fit your space and your child’s exact obsession, whether that is the bowling crease or the trophy lift. Your stadium is closer than it looks.
1. Balloon Arch Stumps Entrance
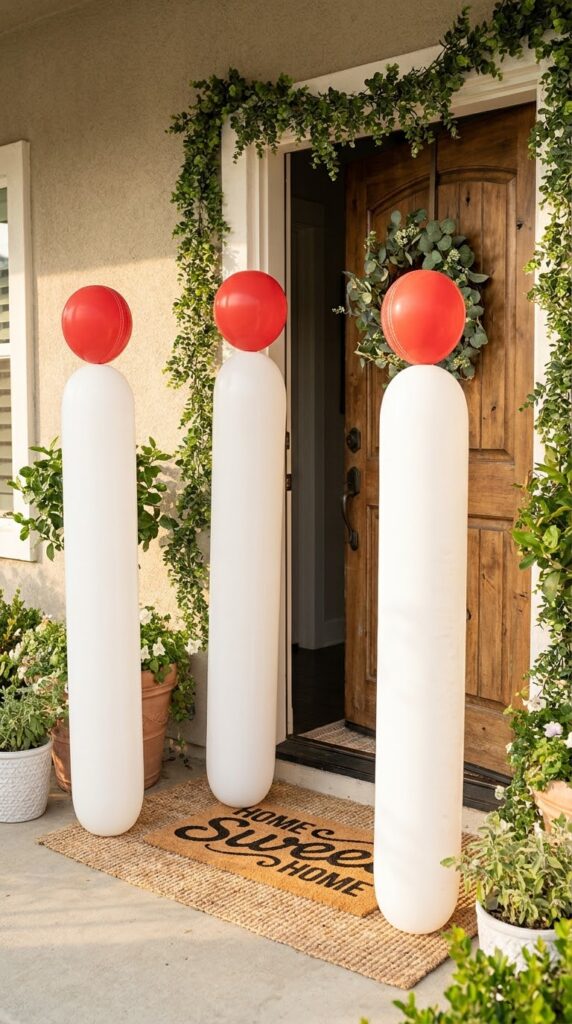
Skip the plain balloon arch. Three tall white balloon columns with a red bail balloon on top, lined up at the door, read as cricket stumps before anyone even asks. It is the first thing guests see, which makes it worth the extra thirty minutes.
Here is the build order:
- Inflate white balloons in two sizes and thread them onto three garden stakes or PVC poles.
- Stagger the sizes so each column looks slightly uneven, the way real stumps do.
- Tie one small red balloon on top of each pole to stand in for the bails.
Set the columns about a foot apart so kids can walk right through them for photos.
Inflate white balloons in two sizes and thread onto three garden stakes.
Stagger the balloon sizes so each column looks slightly uneven like real stumps.
Tie a small red balloon on top of each pole to stand in for the bails.
2. Green Pitch Table Runner
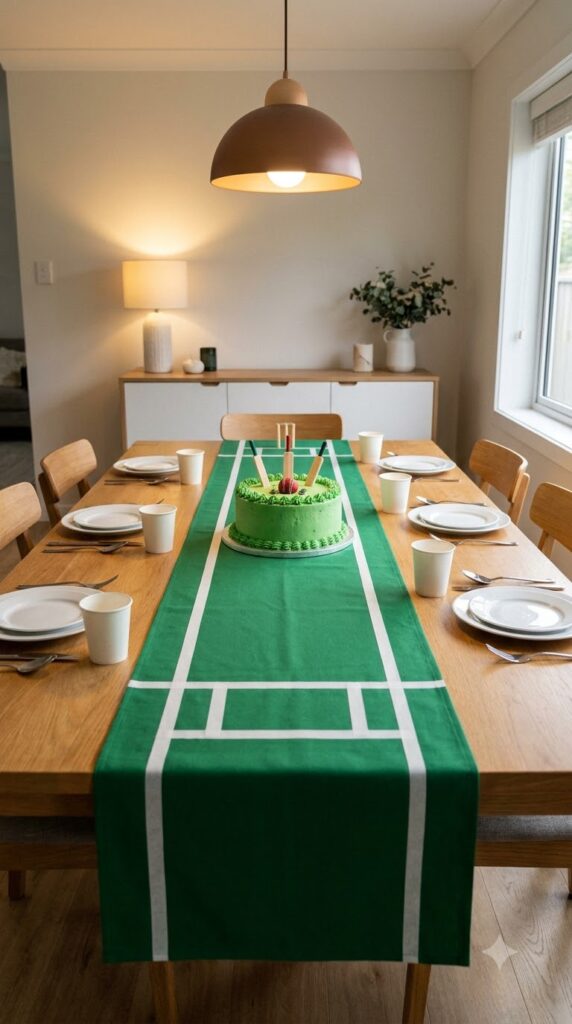
The table is where guests sit the longest, so it earns the most detail. A long strip of green fabric or craft paper down the center of the table, marked with white tape or chalk in the shape of a bowling crease, turns an ordinary table into a miniature pitch.
- Time: about 20 minutes
- Cost: low, one roll of green paper and white tape
- Skill: beginner, no cutting skills needed
Roll the green paper the length of the table, then use painter’s tape to mark two crease lines about eight inches apart near each end. Set the cake or the main dish right in the middle, like it is sitting at the batting end.
3. Bat and Ball Centerpiece Jars
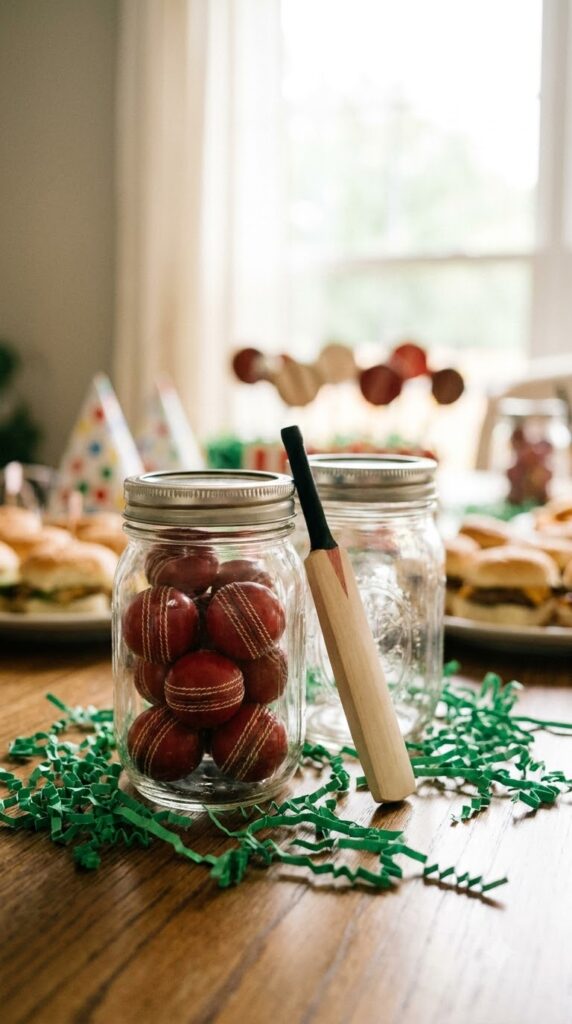
A mason jar filled with mini cricket balls, a small wooden bat leaning against it, and a scattering of grass-green paper shred underneath makes a centerpiece that costs almost nothing and does not block anyone’s view across the table.
Quick Tip: skip a tall centerpiece here. Kids need to see each other and the cake across the table, so keep this one under eight inches tall.
Use two or three jars spaced along the table rather than one giant one in the middle. It reads better in photos and it means every seat gets a good view of at least one jar.
💡 Quick Tip
Keep jar centerpieces under eight inches tall so kids can still see each other and the cake across the table.
4. Custom Jersey Number Welcome Sign
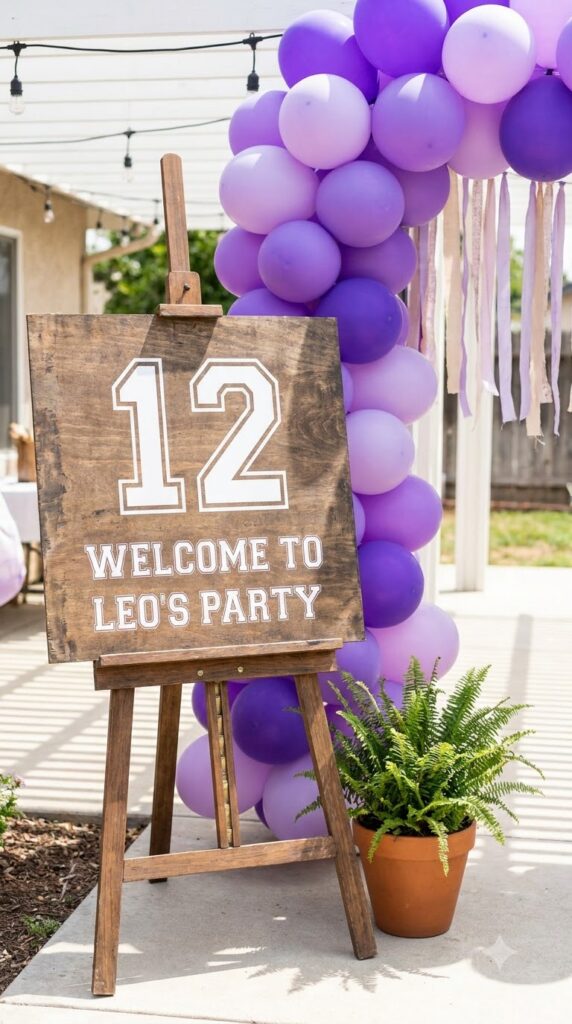
Most welcome signs say the child’s name and the date and stop there. A cricket version adds one more thing: a jersey number, printed big, like the birthday kid is walking out to bat. It gives the sign a reason to exist beyond decoration.
- Do this: pick a number that means something, the child’s age, their favorite player’s number, or their house number.
- Do this: print the sign in the party’s accent color so it matches the rest of the setup.
- Skip this: cramming the sign with too much text. Name, age, and one short line is plenty.
- Skip this: using a real team’s logo or a real player’s photo, since that can run into copyright trouble.
Pick a number that means something to your child.
Print it in your party’s accent color.
Cramming the sign with too much text.
Using a real team logo or player photo.
5. Chalkboard Scoreboard Cake Sign
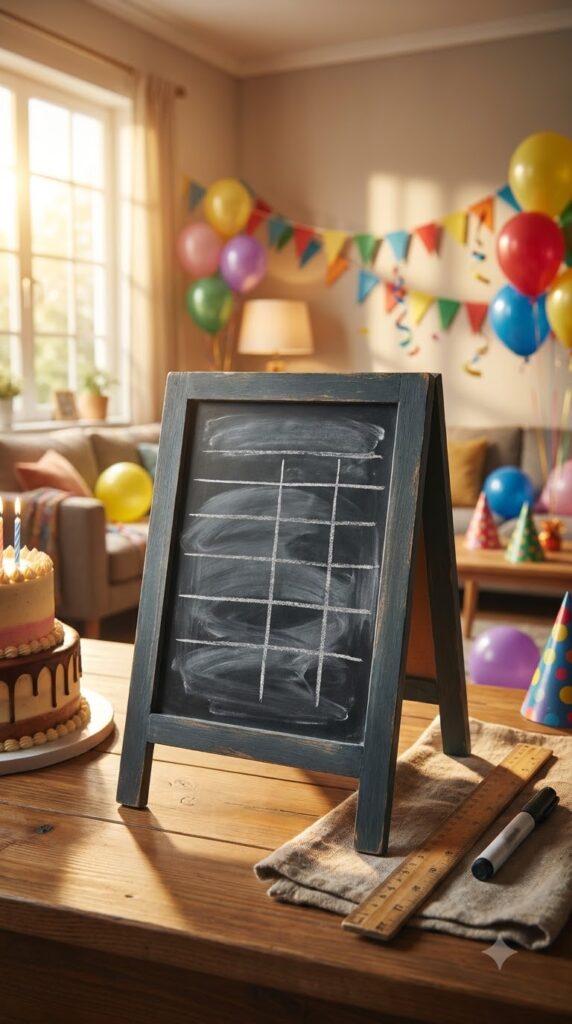
Grab a small chalkboard easel, the kind used for wedding menus, and chalk up a fake scoreboard next to the cake. “Team Turning 7” on one side, a made up run count on the other, and the birthday child’s name as “player of the day” at the bottom.
What to grab first:
- A small A frame chalkboard or a chalkboard contact paper sheet
- White and one colored chalk marker
- A ruler to keep the score lines straight
Set it right beside the cake table so it is one of the first things in every cake photo.
What to grab first
6. Giant Stump Photo Corner
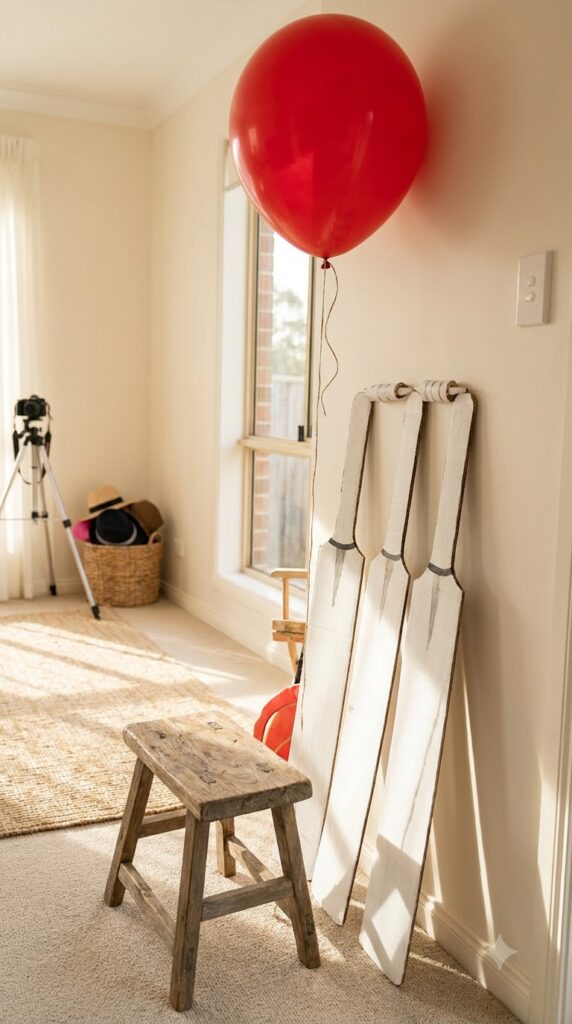
Every party needs one spot built purely for pictures, and a giant stump setup does that job well. Three oversized cardboard stumps, taller than the kids, propped against a plain wall with a single bail balloon overhead, gives guests an instant “I got out” photo pose.
Before: a blank corner of the living room that nobody stops at.
After: a stadium-style photo spot where kids line up on their own to pose mid swing.
Cut the stumps from a large cardboard box, paint them white, and lean them against the wall rather than trying to make them freestanding. It is sturdier and it survives a whole afternoon of kids leaning on it.
A blank corner of the living room that nobody stops at.
A stadium-style photo spot where kids line up on their own.
7. Trophy Table Toppers Versus Store Bought
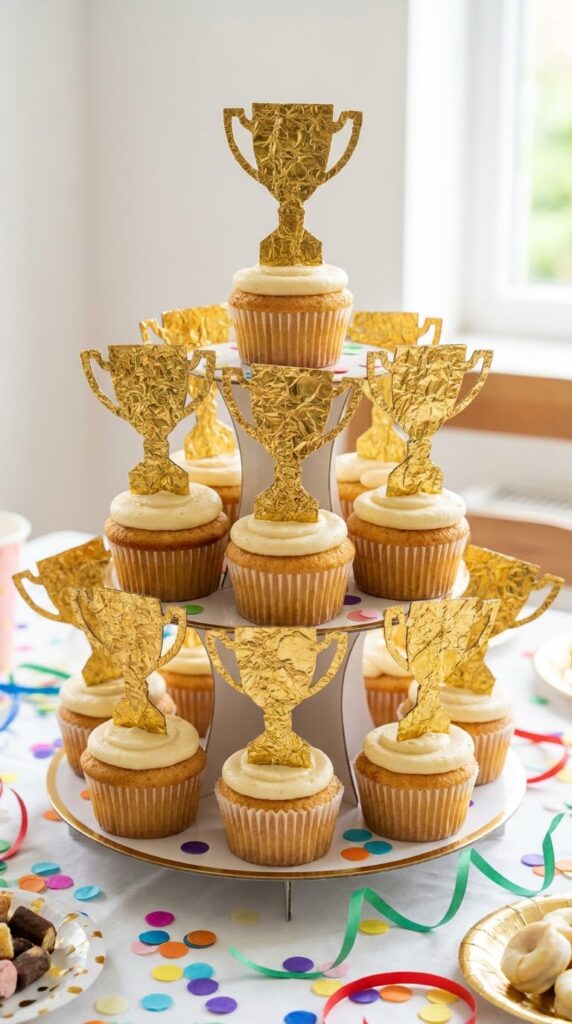
Dessert table toppers are one of those decorations where the store bought version and the DIY version really do look different up close, and it is worth knowing that before you buy a pack online.
| Store bought toppers | DIY foil trophy toppers |
|---|---|
| Ready in five minutes, but often generic gold plastic | Takes about an hour to make a dozen, but matches your exact colors |
| Usually a fixed size that may not fit smaller cupcakes | Sized by hand, so they fit any cupcake or dessert |
If you have the hour, wrap small foam cones in gold foil and glue them to toothpicks. If you do not, the store version still does the job, it just will not photograph quite as sharp.
| Store bought toppers | DIY foil trophy toppers |
|---|---|
| Ready in five minutes, often generic gold plastic. | About an hour for a dozen, matches your exact colors. |
| Fixed size, may not fit smaller cupcakes. | Sized by hand to fit any dessert. |
8. Boundary Rope Table Skirt
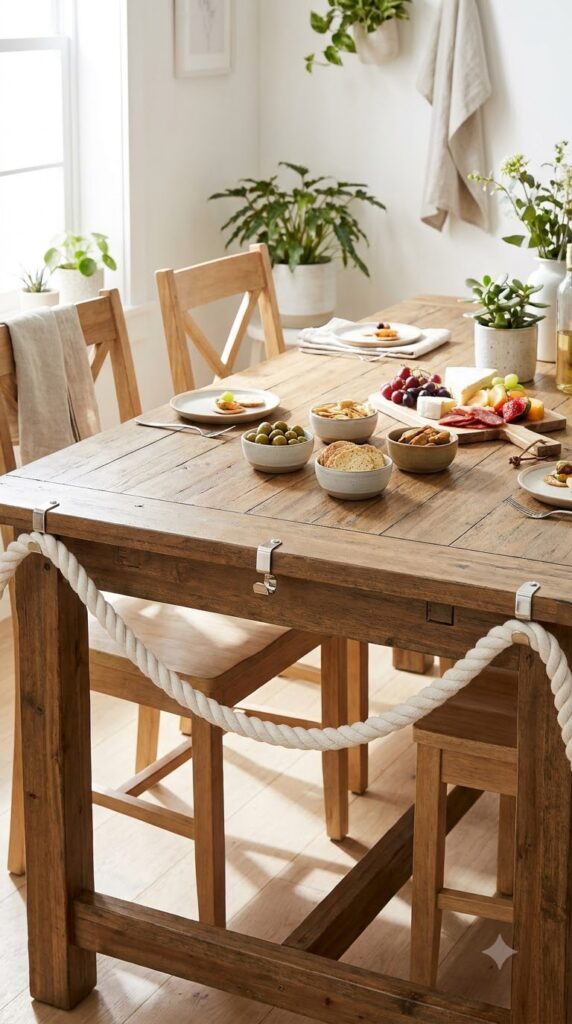
A thick twisted white rope run along the front edge of the food table, the way a real boundary rope circles the field, does more work than a plain tablecloth skirt for almost no extra cost. It is one detail, but it is the one that makes adults notice the theme was actually planned.
The One Thing To Remember: a single well placed rope line does more for the theme than five small props scattered around the room.
Pin the rope along the table edge with small removable hooks, letting it dip slightly between each hook so it has a natural curve instead of a straight, stiff line.
One well placed boundary rope does more for the theme than five small scattered props.
9. Cricket Ball Paper Lanterns
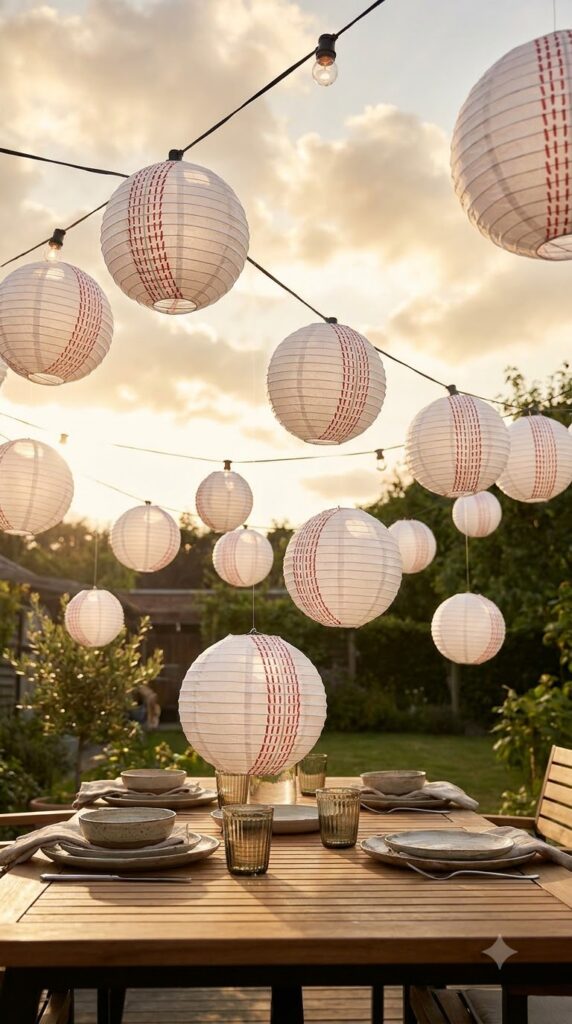
Round white paper lanterns with red seam lines drawn on in marker turn into oversized cricket balls once they are strung up, and they cost about the same as any other paper lantern set.
Quick Tip: draw the seam lines with a ruler and a fine red marker before you inflate the lantern into shape, it is much easier to keep the curve even while the paper is still flat.
Hang three or four at varying heights over the food table instead of one long straight row. The uneven heights read as more playful and they photograph better from below.
💡 Quick Tip
Draw the red seam lines with a ruler before the lantern is inflated, the curve stays much more even.
10. Pennant Banner With Field Icons
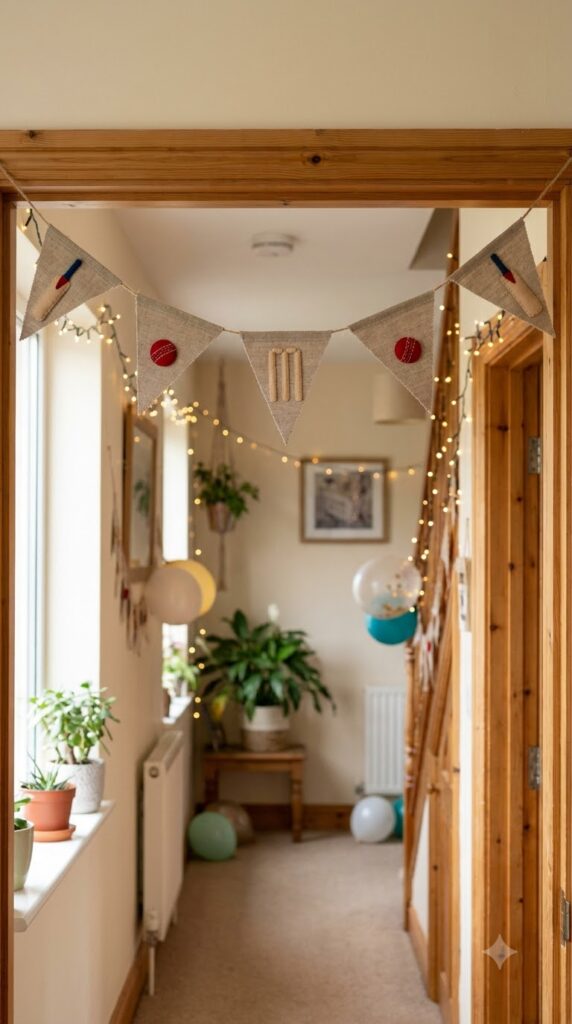
A triangle pennant banner is an easy DIY, but most versions online just repeat one plain shape. For this one, alternate three icons across the flags, a small bat, a ball, and a single stump, cut from felt or cardstock and glued on.
- Time: about 40 minutes for a 10 foot banner
- Cost: low, mostly felt scraps and string
- Skill: easy, works well as a project for older kids to help with
String the finished banner low, at about the height of a doorway, rather than up near the ceiling, so the icons are actually visible instead of disappearing into the room.
11. Helmet and Pads Photo Prop Corner
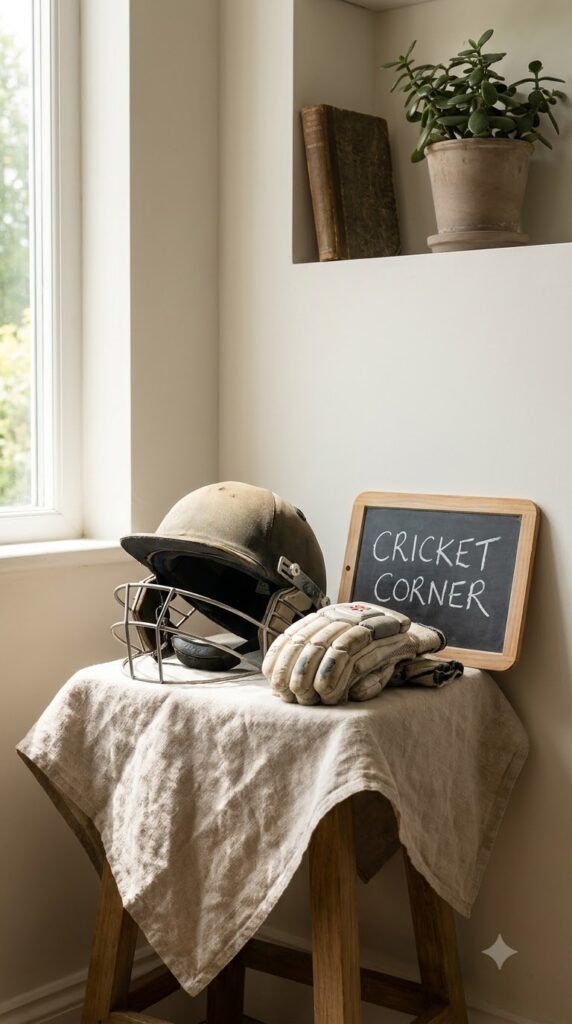
If your child owns a real helmet, gloves, or pads, do not tuck them away for the party. Prop them on a small stand or bench in a quiet corner and let guests pick them up for photos, borrowed gear does more for authenticity than anything store bought.
Here is how to set it up:
- Pick a corner with plain wall behind it, not a busy backdrop.
- Set the helmet and pads on a low stool or a stack of books covered in fabric.
- Add a small sign that says “borrow me for a photo” so shy guests know it is allowed.
Pick a corner with plain wall behind it, not a busy backdrop.
Set the helmet and pads on a low stool or fabric covered stack of books.
Add a small sign inviting guests to borrow it for a photo.
12. Team Color Balloon Garland
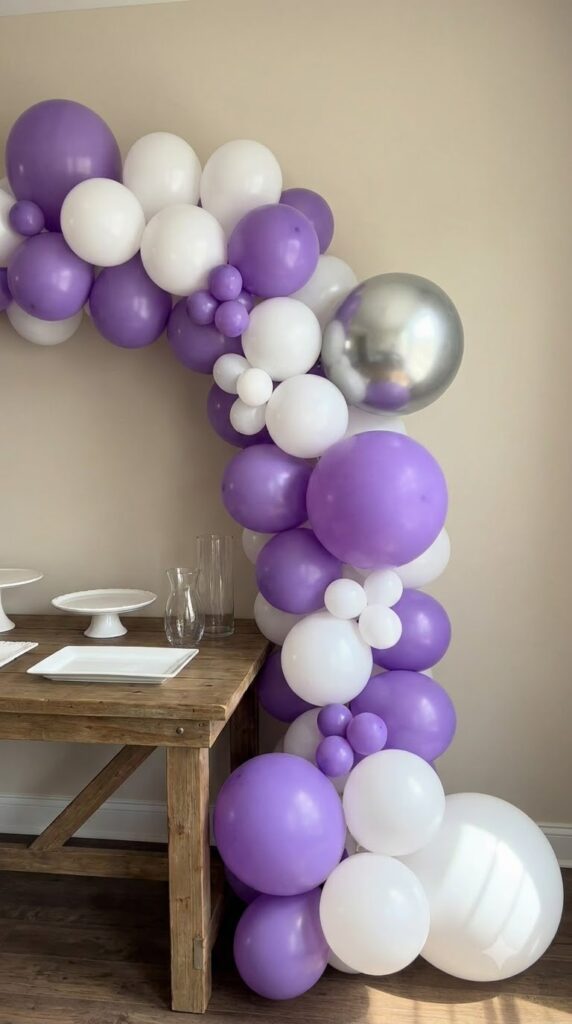
A lot of cricket parties default to red, green, and white, which is fine, but a garland built from your child’s actual favorite team colors feels more personal and it is easier to shop for since you are not hunting for one exact shade of red balloon.
- Do this: pick two main colors plus one metallic accent for shine.
- Do this: mix balloon sizes in the garland, small, medium, and one large every few feet.
- Skip this: using only one balloon size, it flattens out and looks store bought instead of handmade.
- Skip this: stretching one garland across the whole room, two shorter ones over the two main tables read better.
Pick two main colors plus one metallic accent.
Mix balloon sizes so it looks handmade, not flat.
Using only one balloon size.
Stretching one garland across the whole room.
13. Mini Bat Place Card Holders
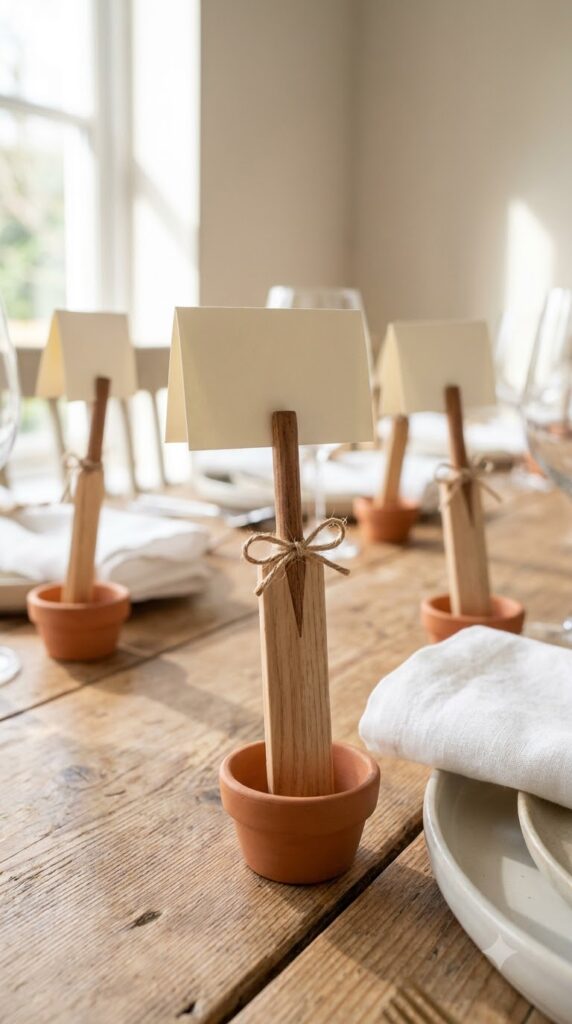
Tiny wooden cricket bats, the craft store kind sold for a dollar or two, make surprisingly good place card holders. Cut a slit near the top of each bat, slide a folded name card into it, and stand it upright in a small ball of clay hidden under the plate.
What to grab first:
- A pack of mini wooden bats from a craft store
- Small folded cardstock for the names
- A little air dry clay or a bottle cap for the base
Kids tend to keep these afterward, so they double as a small favor without any extra cost.
What to grab first
14. Flood Light Lantern String
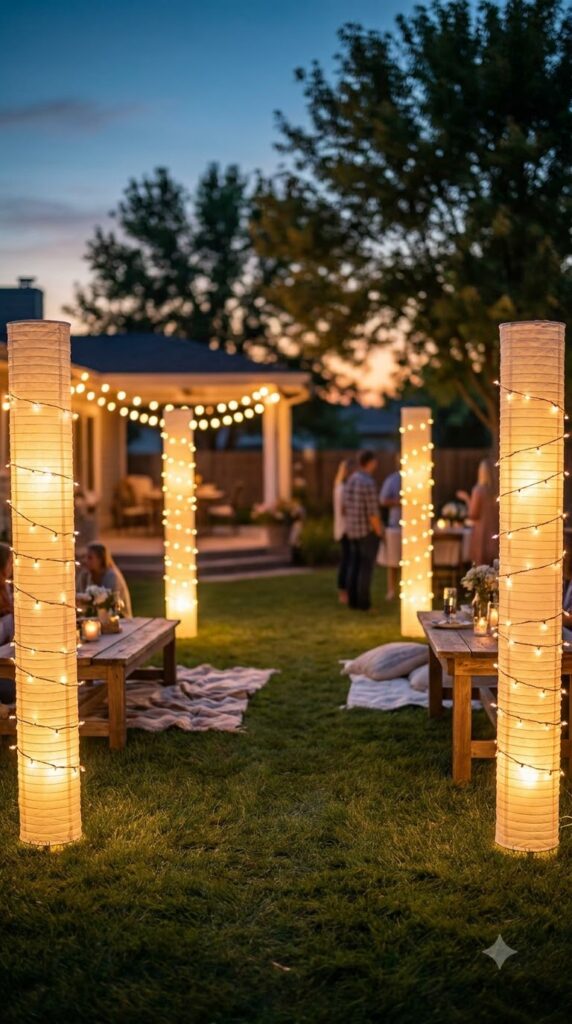
Real stadiums are lit by tall banks of floodlights, and you can echo that after dark with strings of round string lights wrapped around four tall lanterns or paper cones set at the corners of the yard or main room.
- Best for: evening parties or a dusk cake cutting
- Cost: low if you already own string lights
- Effort: about 15 minutes to set up once the lanterns are made
Set the lanterns higher than eye level, on a step stool or hung from a hook, so the light spreads down over the party the way real floodlights do rather than sitting at table height.
15. Real Rope Versus Painted Line Boundary Markers
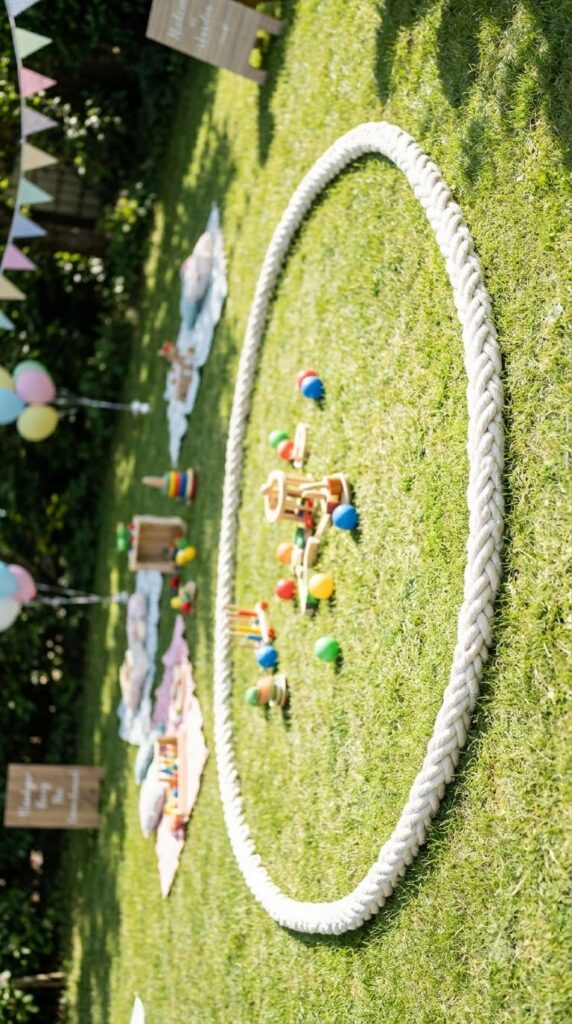
If the party is outdoors, you get to mark an actual boundary line around the play area, and there are two easy ways to do it that look completely different once guests arrive.
| Rope boundary | Painted line boundary |
|---|---|
| Reusable for future parties, easy to store | One time use, but leaves no rope to trip over |
| Takes a few minutes to lay out and adjust | Needs washable field paint and a straight edge |
Rope works better for smaller yards where kids will be running near the edge. Painted lines suit a bigger open lawn where the whole shape needs to read clearly from a distance, like a photo taken from a porch.
| Rope boundary | Painted line boundary |
|---|---|
| Reusable for future parties, easy to store. | One time use, but no rope to trip over. |
| Takes a few minutes to lay out and adjust. | Needs washable field paint and a straight edge. |
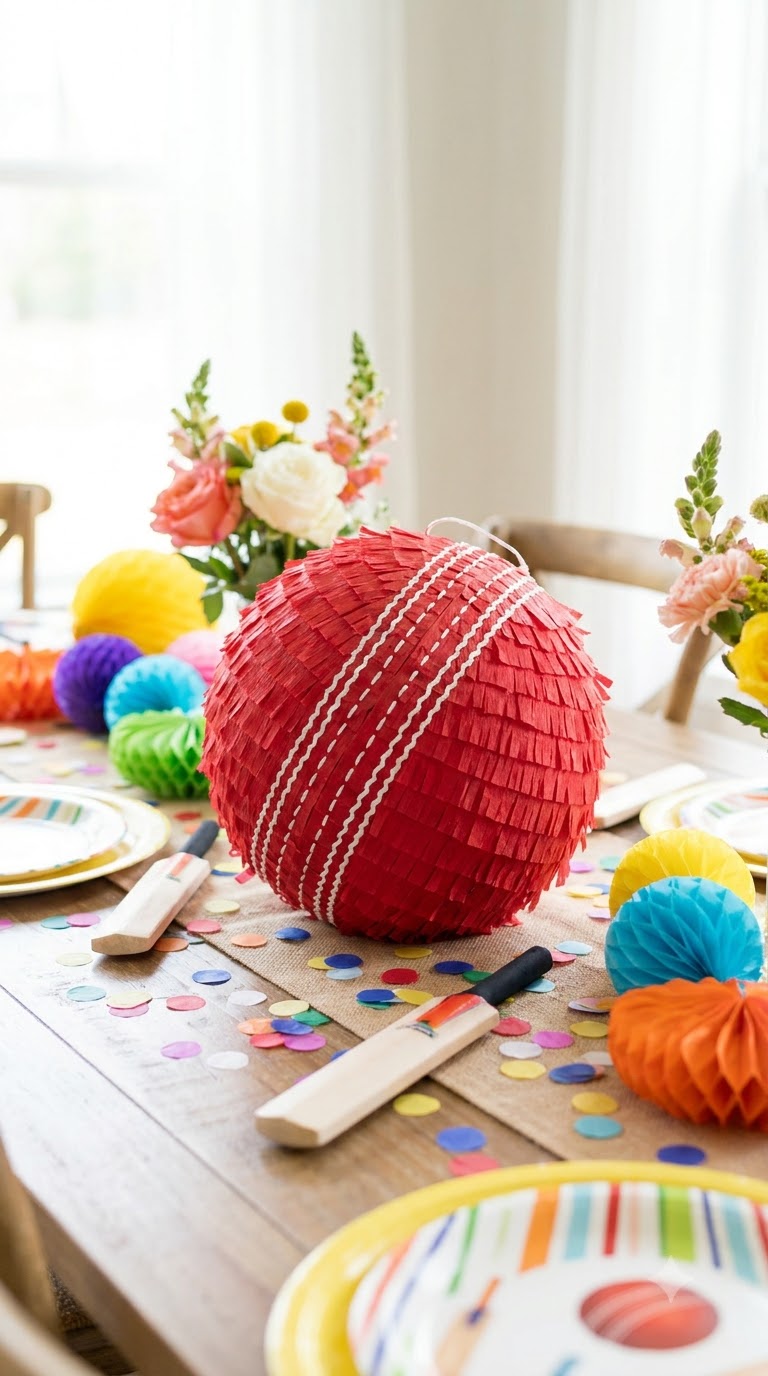
16. Cricket Ball Piñata Centerpiece
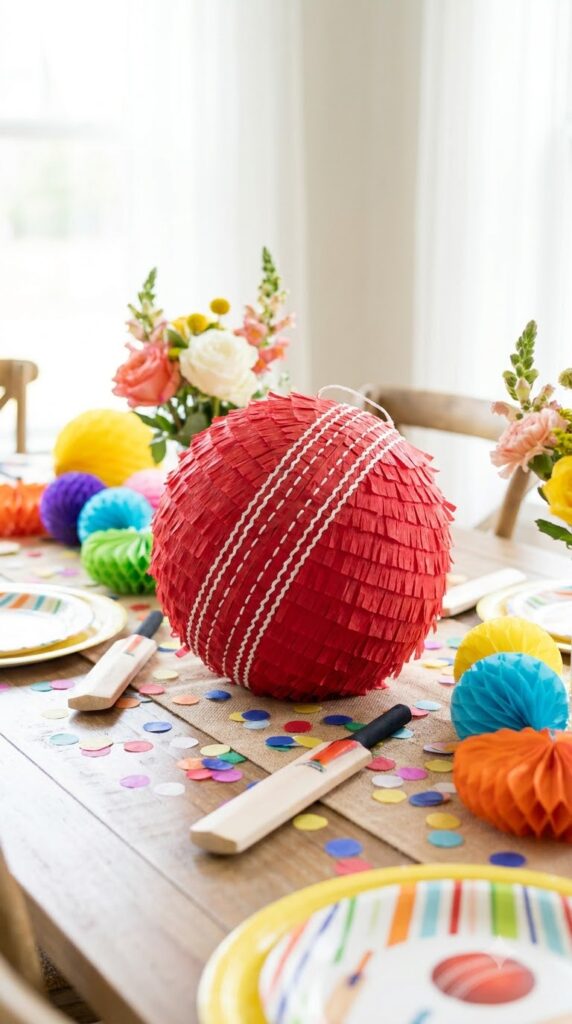
A round red piñata with stitched white lines drawn on works two jobs at once, it sits as the centerpiece through the party and then becomes the afternoon activity once the cake is done. That double duty is worth the slightly higher cost compared to a plain balloon centerpiece.
Before: a table with a centerpiece that gets thrown away at the end of the day.
After: a centerpiece that turns into the most talked about part of the party for the last twenty minutes.
Order or build the piñata a size smaller than a standard one, a full size cricket ball is not that large in real life, and an oversized version can look more like a generic red balloon than an actual ball.
A centerpiece that gets thrown away at the end of the day.
A centerpiece that turns into the most talked about part of the party.
17. Trophy Lift Backdrop Stand
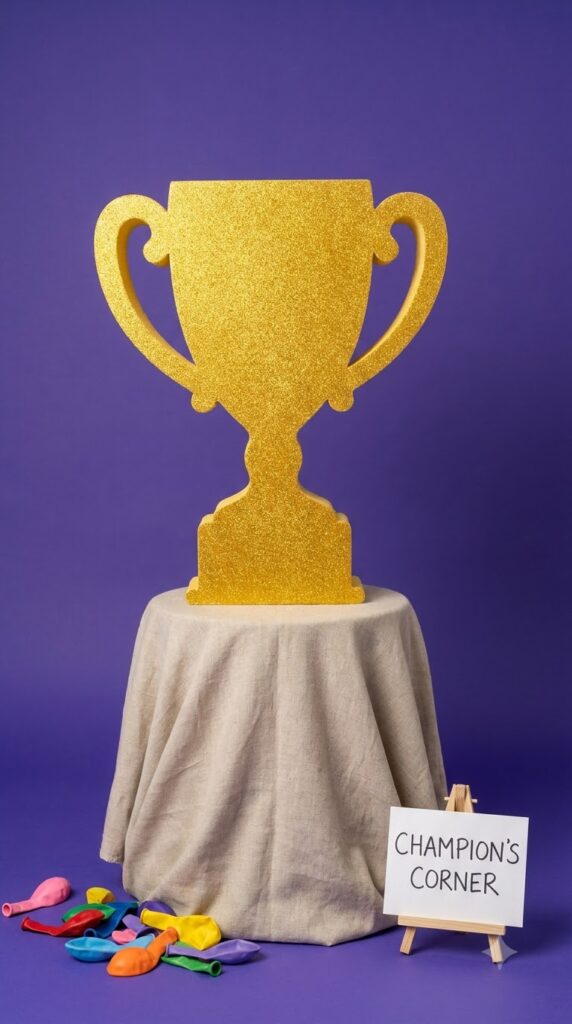
The moment most cricket loving kids actually want is holding up a trophy like they just won the final. Build a small stand, a wrapped box or a covered stool, and set one oversized foam trophy on it in front of a plain colored backdrop so every guest gets a turn at the “winning” photo.
Quick Tip: keep the trophy light. A foam or cardboard trophy wrapped in gold paper is easy for a five year old to lift overhead, a heavier store bought one usually is not.
Line the stand up against your accent color backdrop so the gold trophy has contrast to stand out against in photos.
💡 Quick Tip
Keep the trophy prop light, a foam or cardboard version wrapped in gold paper is much easier for small hands to lift overhead.
18. Grass Fringe Backdrop Wall
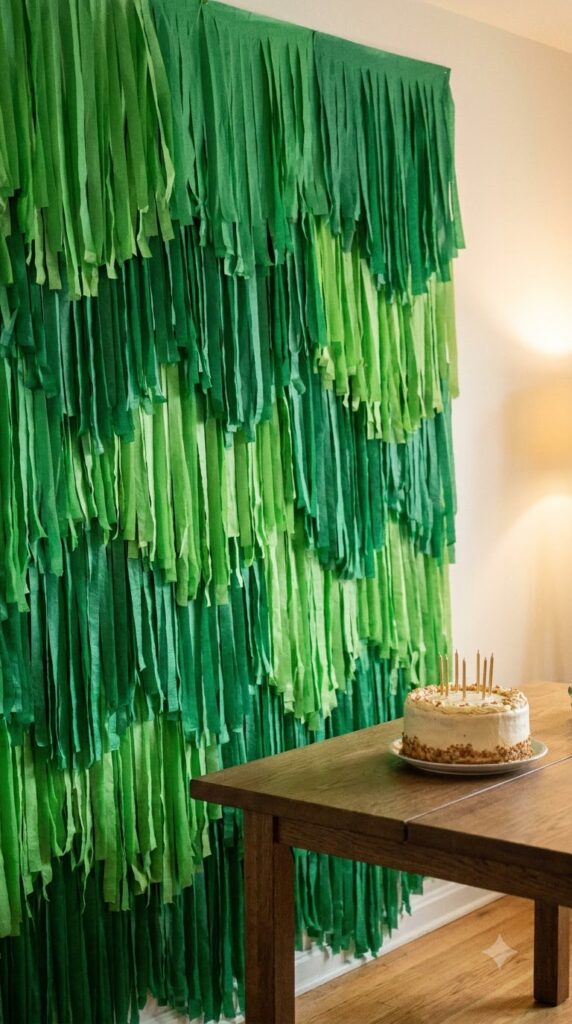
Instead of a flat fabric backdrop, hang strips of green fringe paper or plastic grass mat panels behind the cake table. It gives the wall texture and depth that a plain sheet backdrop cannot, and it holds up better once kids start leaning against it for photos.
The One Thing To Remember: texture behind the cake table photographs better than color alone, a flat colored sheet reads fine in person but often looks empty once it is on camera.
Layer two shades of green fringe if you can find them, it adds shadow depth without any extra effort beyond buying a second roll.
Texture behind the cake table photographs better than a single flat sheet of color.
19. Wicket Keeper Gloves Balloon Weights
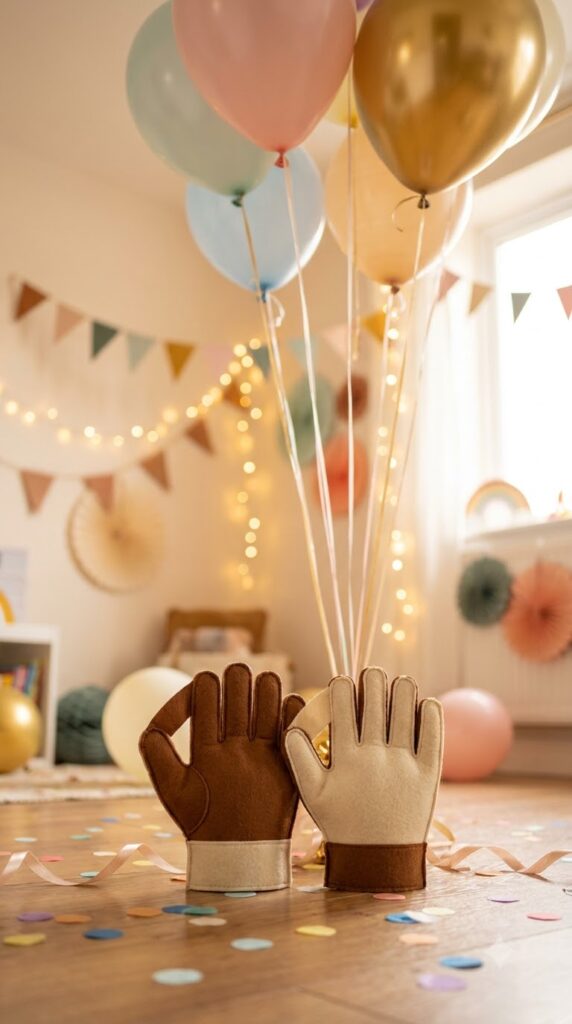
Small details finish a room, and balloon weights are usually the most overlooked one. Instead of plain plastic weights, tie balloon ribbons to a pair of oversized inflatable or felt gloves shaped like wicket keeper gloves, set at the base of each balloon cluster around the room.
Here is how to make them work:
- Cut two glove shapes from stiff felt or foam board, slightly oversized.
- Glue or tape a small loop on the wrist end of each glove.
- Thread the balloon ribbon through the loop and let the glove sit flat on the floor as the weight.
They cost almost nothing to make and they tie every balloon cluster back to the theme instead of leaving a plain weight in view.
Cut two slightly oversized glove shapes from stiff felt or foam board.
Glue or tape a small loop on the wrist end of each glove.
Thread the balloon ribbon through the loop and let the glove sit flat as the weight.
Wrapping Up
You do not need every idea on this list to pull off a real cricket theme birthday party. Pick the entrance piece, one table detail, and one photo corner, and the room already reads as a stadium celebration before a single balloon garland goes up. That is really the whole trick behind good cricket theme birthday party decoration ideas, a few well placed details do more than a room full of scattered ones.
Start with whatever your child talks about most, the trophy lift, the boundary rope, or the giant stumps corner, and build outward from there. Save this list so you have it handy when the planning actually starts.
