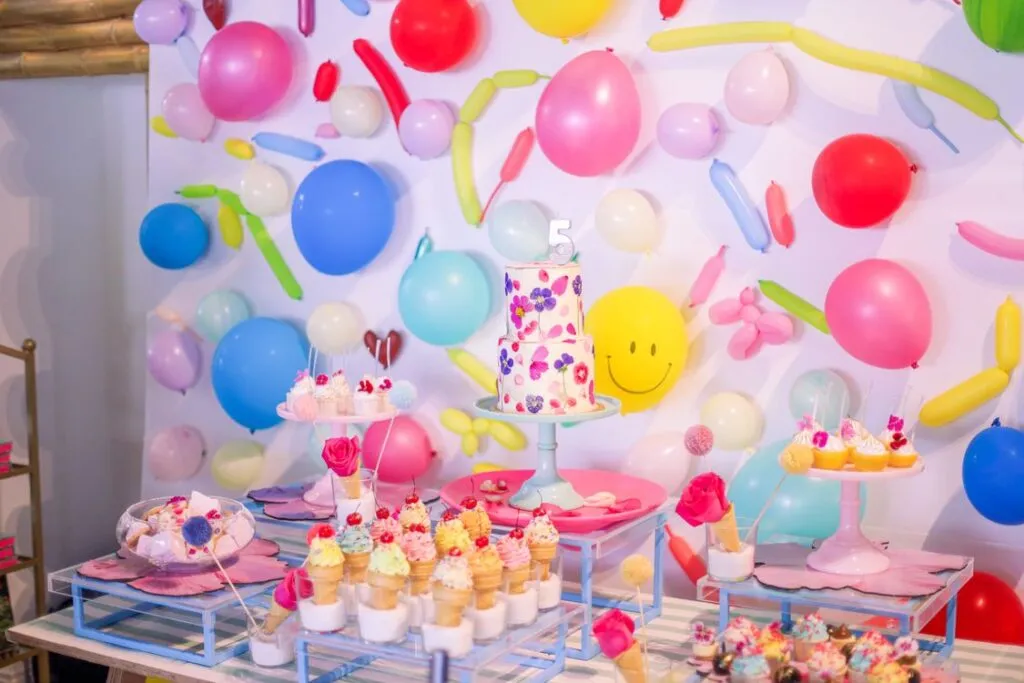
Some dessert tables look good from across the room, and some look even better when you see the whole layout from above. This collection brings together real birthday dessert tables shared on Instagram by real people and planners, so you can see exactly how each one looked. Under each post, you will find what makes it work, plus a quick checklist or tip to copy it at home.
Look for the cake placement, the rows of smaller treats, and the little gaps that keep the table from feeling crowded. A flat lay view makes those choices easy to spot, and even the tables filmed from a higher or side angle show how spacing, height, and color can pull a whole display together.
1. Put a Butterfly Cake in the Middle and Build Around It
Credit: @tiffbakescakesllc, Lanham, Maryland, United States, via Instagram.
This 15th birthday dessert table puts a blue butterfly cake right in the centre, so the eye lands there first. Cupcakes and other treats sit around it in a loose ring, and white flowers soften the edges without hiding the food.
To copy it, choose one tall cake as your anchor, then place smaller treats in matching colors around it. Leave a little breathing room between groups so guests can see each item and reach it with ease.
Copy it checklist
- One tall cake in the centre
- Smaller treats in the same color story
- White flowers or greenery at the edges
- Clear gaps between treat groups
2. Use Pink and Gold Rows for a Sweet 16 Table
Credit: @jazikreations, via Instagram.
This sweet 16 table is full of pink and gold treats, including shooters, chocolate covered strawberries, candy apples, and cakesicles. A tiered cake sits with balloons nearby, and the treats form neat rows that make the whole table easy to read at a glance.
What makes it work is the repeat of just two main colors across many small items. For your own table, pick two colors, then use them on cups, wrappers, stands, and a few larger pieces so the display feels planned rather than random.
Quick tip
Repeat pink and gold in at least three places, such as the cake, the cups, and the table cloth edge, so the color story holds together from every angle.
3. Let a Long Table Run Do the Talking for a 50th Birthday
Credit: @charcuterie_queens_official, Alexandria, Virginia, United States, via Instagram.
This first dessert table from the maker was created for a 50th birthday party, and the long run of treats is the star. Seen from the side, the table shows how a steady line of desserts can look generous without needing a tall backdrop.
To copy it, keep the line low and even, then add one or two taller pieces near the middle for a focal point. That balance helps guests walk along the table and pick what they like without reaching over a wall of food.
Budget tip
Use one long cloth, a few simple trays, and treats in one main color family. The long, tidy line will look full even before you add fancy stands.
4. Use a Two Tier Cake and Cupcake Towers for a Sweet 16 Table
Credit: @_kelseyskupcakes, via Instagram.
This Sweet 16 dessert table puts a two tier cake in the centre, with a Sweet 16 topper, pink roses, and a dark lower tier. Cupcake towers stand on both sides, and cakesicles sit in neat rows in front, so the whole table reads as one balanced display.
What makes it work is the symmetry, with towers on both sides, cake in the middle, and small treats in front. Copy that shape at home by placing your cake first, then matching towers, then a low front row that guests can reach easily.
Do this / Skip this
Do this: keep the towers the same height on both sides. Skip this: adding a second tall piece behind the cake, which can hide the topper in photos.
5. Go Black, White, and Gold for a Bold 40th Table
Credit: @dessertdelitx, via Instagram.
This 40th birthday table pairs a gold cloth with a black, white, and gold cake topped with the number 40. Rows of pretzels, brownies, and popcorn cups sit beside a cupcake tower, so the table reads as rich and organized at the same time.
The strong layout works because the dark and light treats take turns across the table. Try that same rhythm at home: place a light treat next to a dark one, and let the gold pieces act as the bridge between them.
Copy it in steps
- Cover the table in gold or a warm neutral cloth.
- Place the numbered cake in the centre.
- Add a cupcake tower to one side for height.
- Fill the front with neat rows of small treats.
6. Make One Full Table Work for Any Birthday Party
Credit: @polkadotcakenj, via Instagram.
This full dessert table has a white skirt, a cake in the centre, a macaron tower, cupcakes, balloons, and a clock backdrop. The maker presents it as a one stop table for a next event, shower, or party, and the same full layout adapts well to a birthday.
What makes it work is the mix of one tall cake, one tower, and many small treats in between. For a birthday version, keep the white base, then add balloons and a cake topper in the birthday colors so the theme is clear at once.
At a glance
| Centre | One show cake |
| Height | Macaron tower and balloons |
| Small treats | Cupcakes and cookies |
7. Lay Out a Minecraft Cake and Biscuit Set From Above
Credit: @carascreativecakes, Hereford, Herefordshire, United Kingdom, via Instagram.
This Minecraft flat lay was made for Ross and his 9th birthday, and it shows a cake and biscuit set laid out in green and brown. Seen from above, the shapes and colors read like a little scene, which is perfect for a themed party table.
To copy it, place the cake slightly off centre, then fan the biscuits around it in the same green and brown tones. Leave the background plain so the theme pieces stand out in photos.
Colour plan
Green for grass and leaves, brown for earth and wood tones, and white for a clean base. Add one bright accent only, such as a red detail, so the theme stays easy to read.
8. Turn an Alice in Wonderland Table Into a Pink Flat Lay
Credit: @saintlysweetkitchen, via Instagram.
This Alice in Wonderland dessert table was made for a first birthday, and the flat lay style view shows a pink table with clock cookies, a gold key, dessert cups on lilac stands, and glass domes. The theme details are small, so they feel magical rather than loud.
What makes it work is the way each themed piece has its own spot. Copy that by choosing three theme props, placing them apart, and filling the space between them with simple cups and cookies in matching colors.
Copy it checklist
- Pink table cloth or runner
- Clock cookies for the theme
- One gold key or similar prop
- Dessert cups on lilac or pastel stands
9. Go Red and Silver for a Bold Sweet 16 Table
Credit: @touchofclassbymjm, via Instagram.
This Sweet 16 dessert table uses a bold red cloth, with three white cakes on sparkling crystal stands as the main group. A cupcake tower stands to one side, candy jars add color at the edges, and plates of brownies sit at the front, so the table feels full without looking messy.
What makes it work is the strong contrast between the red cloth and the white cakes, which keeps the eye moving across the table. Copy that by choosing one bold cloth color, then keeping the cakes white, and adding small treats in the same red and silver tones at the sides.
Quick tip
Let the cloth do the bold work, and keep the cake colors simple. When the cakes stay white, the red and silver details stand out even more.
10. Use Royal Blue, Silver, and Bling for a Sweet 16 Table
Credit: @sohasweettreats, via Instagram.
This sweet 16 dessert table uses royal blue, silver, and bling, with a blue hydrangea bouquet in the centre, a cupcake tower, and cheesecakes in a row at the front. Cake pops, cupcakes, and other treats fill the sides, so the table feels rich from every side.
The centre bouquet is the trick here: it adds height and color without taking space from the food. For your own table, place one flower bunch in the middle, then keep the front row low so guests can see and reach the treats.
Budget tip
Use one large flower bunch as the centrepiece and simple silver trays for the rest. The flowers do the fancy work, so the trays can stay plain.
11. Keep a Sweet 16 Cupcake Stand Simple From Above
Credit: @pennpastries, via Instagram.
This sweet 16 cupcake stand is shown from above, with pink cupcakes in neat rows and party plates behind them. The caption is short and sweet: sweets for the sweet 16, and the photo lets the cupcakes do the talking.
To copy it, choose one cupcake color, use a single stand, and keep the background simple. That restraint makes a small display look polished, and it photographs well from above.
Do this / Skip this
Do this: use one stand and one main color. Skip this: mixing five cupcake styles on one small stand, which can look busy from above.
12. Make Black, White, and Gold Feel Fun for a 50th Birthday
Credit: @jenni_pops, via Instagram.
This dessert table was made for a 50th celebration with the theme a tini bit older, and the maker notes that the dessert table understood the assignment. Cake pops, cookies, cake, macarons, and cupcakes fill a black, white, and gold display, with a photo wall behind it.
What makes it work is the playful theme on top of a classic color set. Copy that by adding one fun phrase or prop, then keeping the food colors strict so the joke reads clearly and the table still looks elegant.
Copy it in steps
- Choose black, white, and gold as the only food colors.
- Add cake pops in rows for easy grabbing.
- Place the cake and macarons as the centrepiece group.
- Add one fun sign or prop for the age theme.
13. Build a Spidey Table With Rows of Small Treats
Credit: @smile.cakestudio, via Instagram.
This Spidey and Friends dessert table lists Oreo pucks, cake pops, cakesicles, pretzels, cupcakes, mini donuts, and sugar cookies. Seen as a whole, the table works because the small treats form clear rows around the cake and cookies.
To copy it, start with the cake, then add one row of each small treat in front of it. That row by row plan keeps a themed table easy to build, even when you have many kinds of treats.
At a glance
| Cake | Spidey cake as the centrepiece |
| Rows | Pops, cakesicles, pretzels, donuts |
| Extras | Cupcakes and sugar cookies |
14. Lay Out Boho Cupcakes in Gold Bases From Above
Credit: @yumcitysweets, via Instagram.
This boho inspired dessert setup was made for Ari and Maddie, with cake pops, cookie cups, and cupcakes in gold bases. Seen from above, 12 domed cupcakes sit in neat rows, with number 1 and 5 decorations adding a birthday touch.
The gold bases are what lift this layout: they give each cupcake its own little stage. Copy that by using gold cups or small stands, then keeping the rest of the table soft and neutral so the gold shines.
Colour plan
Soft cream and blush for the cupcakes, gold for the bases, and warm wood or beige for the table. Keep flowers small so the gold rows stay the star.
15. Keep a Pastel Animal Cake and Cupcake Spread Soft and Sweet
Credit: @smile.cakestudio, via Instagram.
This pastel animal birthday dessert table pairs a soft pastel cake with cupcakes in matching rows. Seen from a high angle, the cake sits with the cupcakes around it, so the whole spread feels gentle and sweet rather than busy.
To copy it, choose pastel frosting for the cake and cupcakes, then keep the animal details small and in the same tones. That soft palette photographs beautifully from above and works for many ages.
Copy it checklist
- Pastel cake as the centrepiece
- Matching pastel cupcakes in rows
- Small animal details in the same tones
- Plain light table cloth for a soft photo
FAQs
How many treats should I put on a dessert table?
Start with one cake, one taller piece such as a tower or stand, and two or three kinds of small treats. That mix looks full without making the table hard to use.
How do I photograph a dessert table from above?
Stand on a sturdy step if you can do so safely, keep the table in even light, and leave a little space around the edges of the frame. A plain cloth helps the food stand out.
What is the easiest flat lay layout for a first timer?
Place the cake in the centre, put matching treats in rows on both sides, and add one low front row. That simple shape works for almost any theme.
Should all the treats match in color?
They do not need to match exactly, but two or three main colors will make the table look planned. Use those colors on wrappers, stands, and one or two larger pieces.
How far ahead can I set up the table?
Set up stands, cloths, and props the day before if you can, then add the food on the day of the party. Keep cakes and cream treats cool until guests arrive.
Final Thoughts
Every table in this collection started with the same simple idea: one strong centrepiece, neat rows of small treats, and a little space to breathe. Whether you love pink and gold, bold black and gold, or soft pastels, that shape will help your table look lovely in photos and easy to enjoy in real life.
Pick one idea that fits your party, save it to Pinterest for later, and build your own version with the colors and treats your birthday guest loves most. The best dessert table is the one that makes guests smile as soon as they walk in.