

Planning a birthday party takes real effort, and finding centerpiece ideas that match your theme while actually looking great is harder than it sounds. Parents often spend hours searching only to find options that feel generic or too expensive to pull off at home.
Good news: every idea in this guide is beginner-friendly, budget-smart, and built specifically around a construction theme. Keep reading and you will find exactly what you need to make those tables look amazing.
Mini Construction Zone Centerpiece
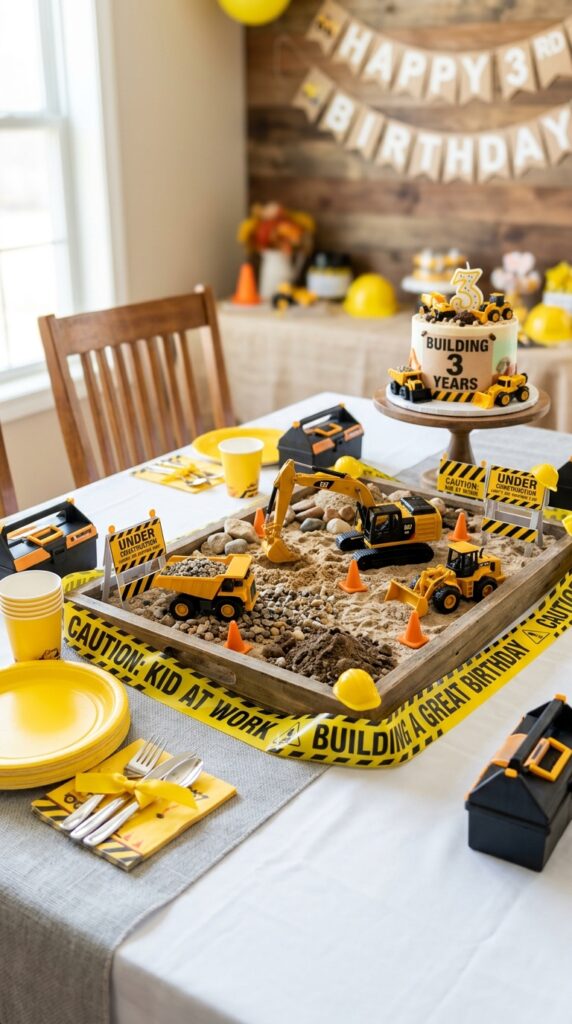
Few centerpiece ideas grab a child’s attention faster than a tiny working construction site right on the table. Yellow toy dump trucks, mini excavators, and striped caution flags sitting in a sand-filled tray create a scene kids instantly want to touch and explore.
Parents love it because setup is quick and the visual payoff is massive. Black and yellow table accents around the tray pull the entire theme together beautifully.
Tool Bucket Centerpiece
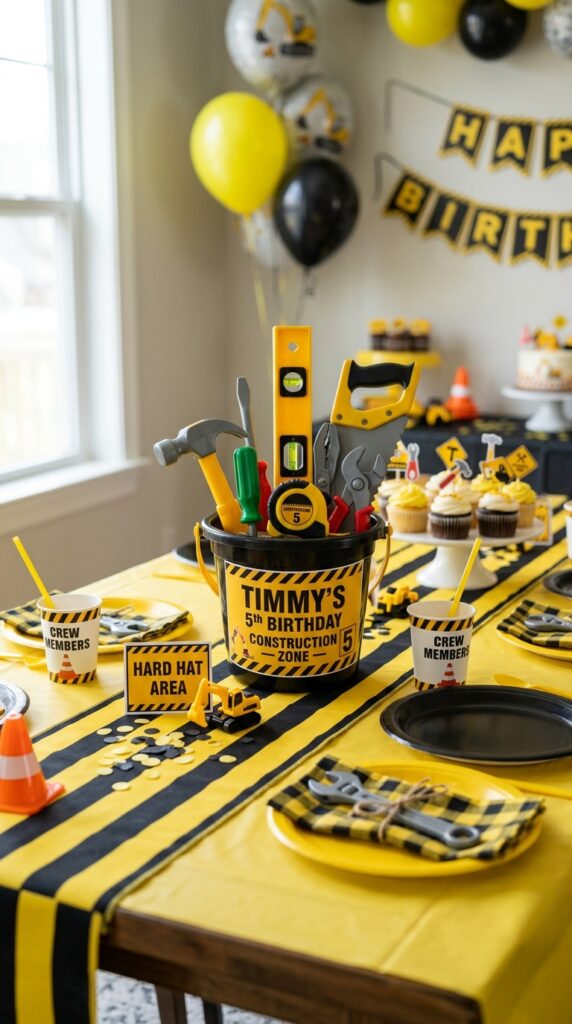
Metal or plastic buckets stuffed with toy tools like hammers, wrenches, and screwdrivers make for one of the most practical centerpiece ideas on this list. Wrapping a strip of caution tape ribbon around the bucket instantly ties it into the construction theme without any extra effort.
What makes this setup stand out is that it doubles as a party favor station. Kids can grab a tool to take home, giving the centerpiece real value beyond decoration.
Hard Hat Candy Bowl Centerpiece
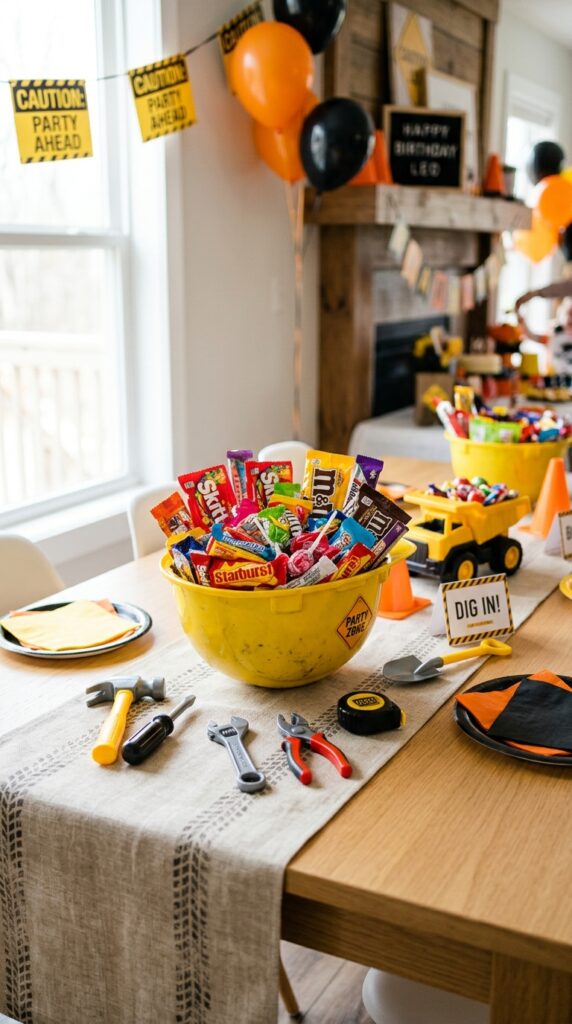
Flipping a bright yellow plastic construction helmet upside down and filling it with wrapped candies is one of those ideas that looks clever without requiring any real effort to pull off. Kids immediately recognize the hard hat and feel drawn toward it across the room.
Placing small decorative tools around the base of the helmet adds depth to the display. Keep extra candy nearby so refilling takes only seconds throughout the party.
Traffic Cone Floral Centerpiece

Mini orange traffic cones used as tiny vases are an unexpected twist that adds real height and color to any construction party table. Their bold orange shade pops naturally against dark or neutral tablecloths, making the arrangement visible from every angle in the room.
Inserting artificial flowers or themed decorations into foam-filled cones softens the rugged construction look just enough. Arranged in a small cluster at the center, they create a balanced and festive display.
Wooden Block Stack Centerpiece
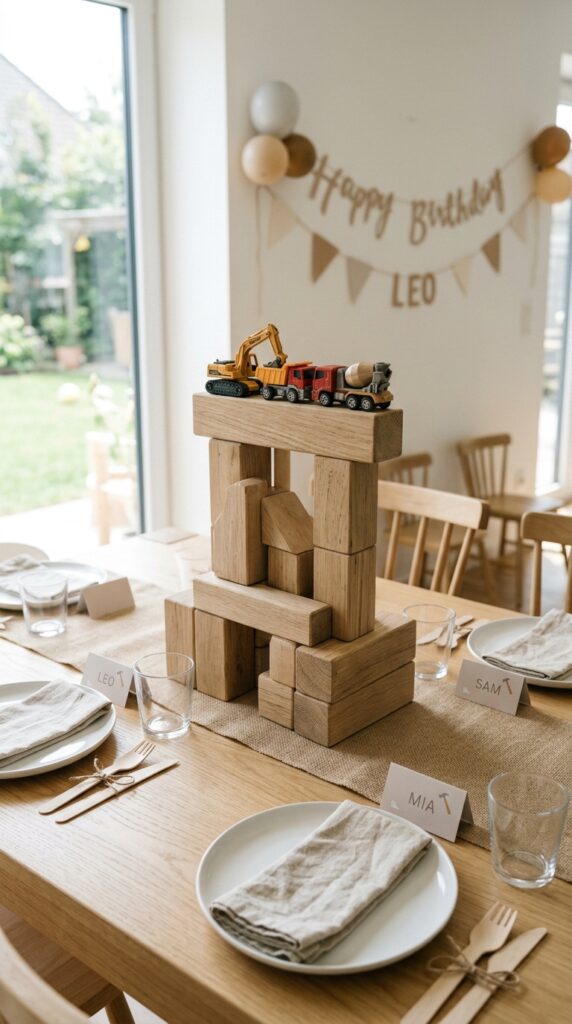
Stacking natural wood blocks in the center of a table delivers warmth, texture, and strong thematic presence all at once. Unlike plastic props, wooden blocks feel intentional and well-styled, giving the table a more crafted and thoughtful appearance.
Placing small toy construction vehicles on top of the stack creates a mini scene that sparks imagination. Keep the height moderate so guests can still see each other clearly across the table.
Caution Tape Wrapped Vase
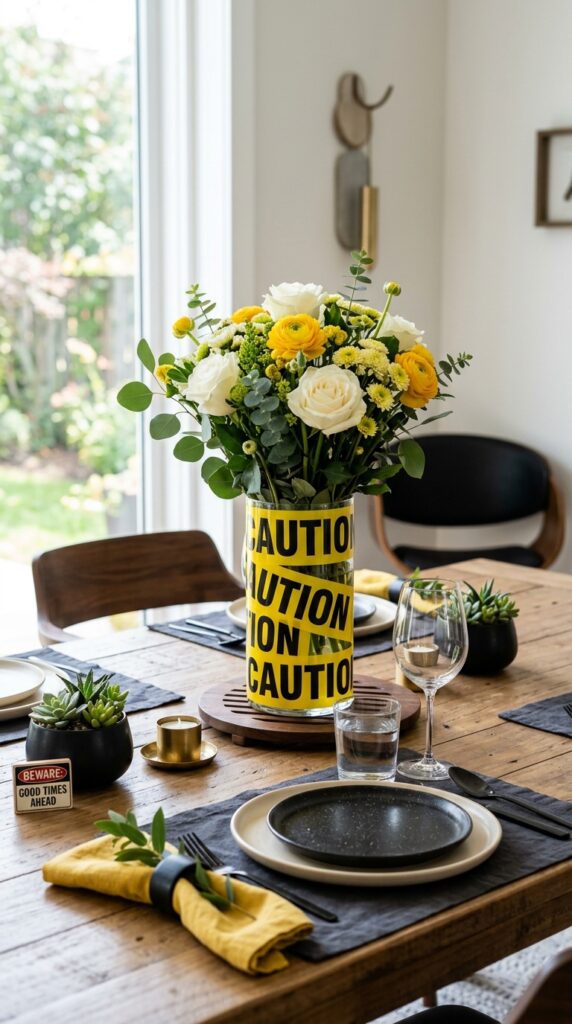
Wrapping any plain glass jar or vase with black and yellow caution tape is one of the fastest DIY centerpiece ideas that still manages to look polished and put together. It costs almost nothing and can be repeated across every table in minutes.
Filling the wrapped vase with flowers, decorative branches, or themed paper props keeps each table visually interesting. Slight variations in fillers across tables prevent the look from feeling repetitive throughout the venue.
Mini Dump Truck Snack Display
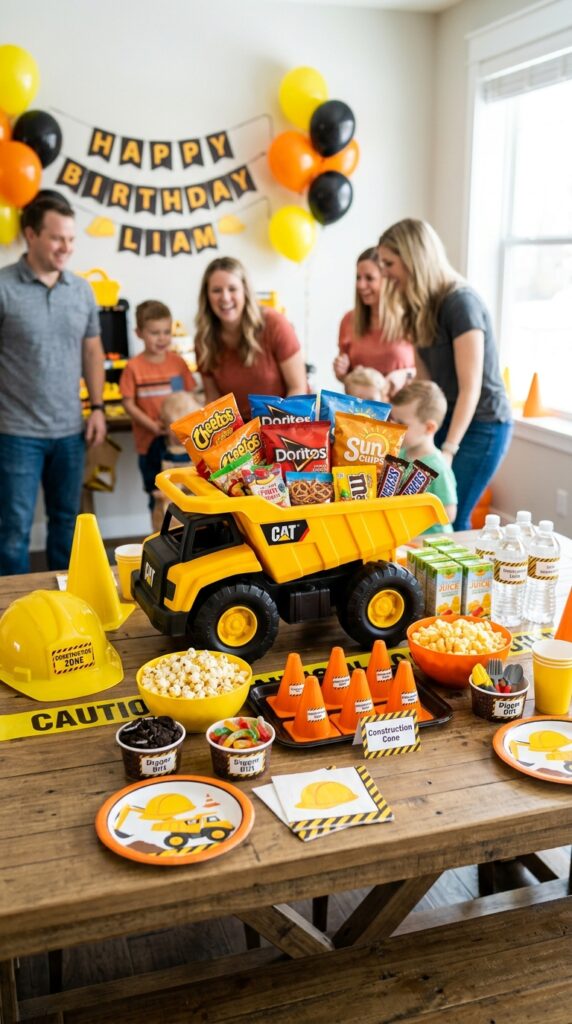
Loading a toy dump truck with packaged snacks or small treats turns a simple decoration into something genuinely useful during the party. Kids are naturally drawn to it, and having snacks right at the table reduces the constant back-and-forth to a separate snack station.
Placing the truck on a small decorative base and adding mini traffic cones or signs around it completes the scene. It keeps children engaged with the table long after their first snack grab.
Blueprint Table Display Centerpiece
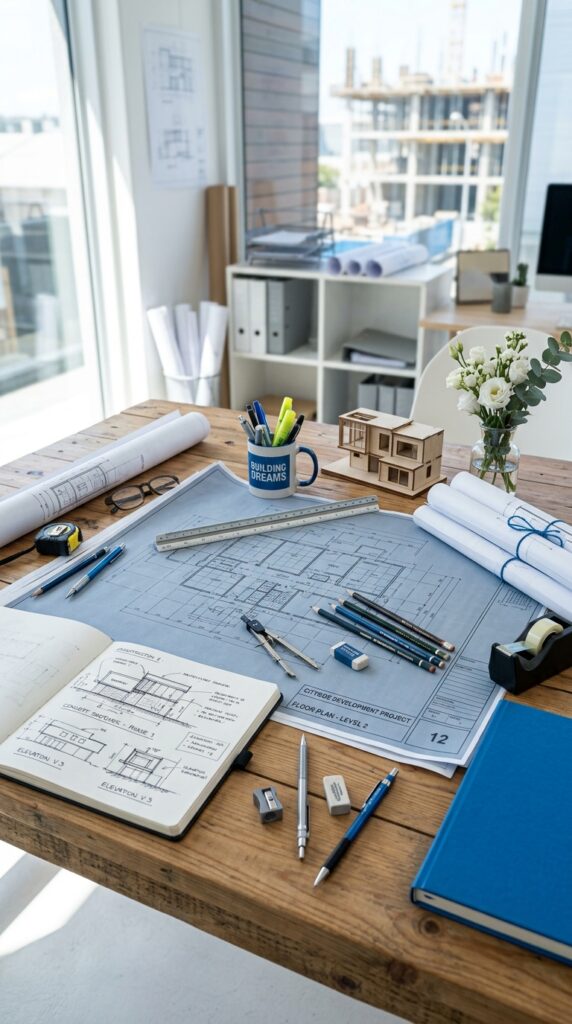
Laying down a sheet of blue paper printed with construction sketches, lines, and measurements creates a centerpiece base that feels smart and styled. It captures the planning and design side of construction, adding a layer of creativity that goes beyond the usual toy-based displays.
Placing small rulers, toy tools, and a central decorative element on top of the blueprint base pulls everything together cleanly. Keeping the layout minimal ensures the design reads clearly rather than feeling cluttered.
Excavator Toy Scene Centerpiece
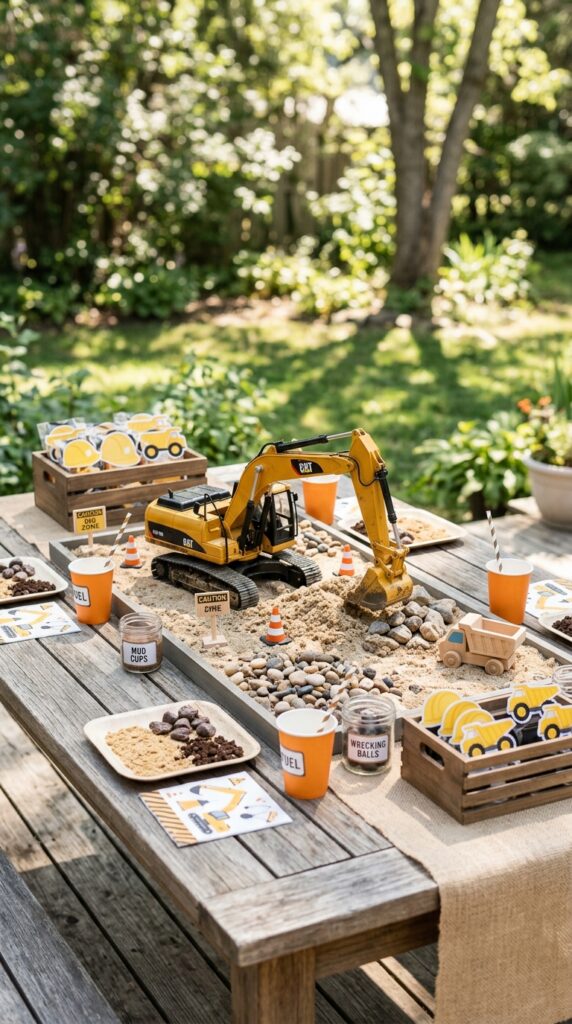
Positioning a toy excavator mid-dig inside a shallow tray filled with sand and small rocks creates a scene that tells a story without a single word. Children stop, stare, and immediately want to get involved, making it one of the most engaging setups on this entire list.
Adding orange cones and small barriers around the edges of the tray makes the construction scene feel complete and realistic. Keeping the tray edges clean and defined gives the whole display a sharp, finished look.
Construction Sign Centerpiece
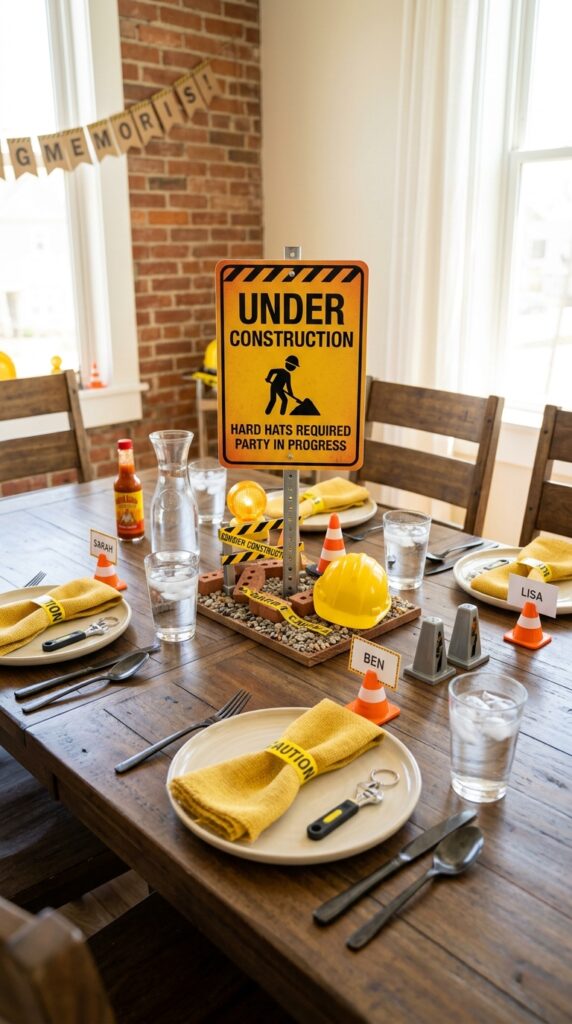
Bold yellow and black construction signs mounted on sticks and placed in a small base container create an instant focal point on any party table. Printed caution symbols, stop indicators, or fun birthday messages make each sign feel personal and on theme.
Height is what makes this centerpiece work so well. Signs stand tall above the rest of the table, giving the display strong visual presence without taking up much surface space around them.
Nuts and Bolts Jar Centerpiece
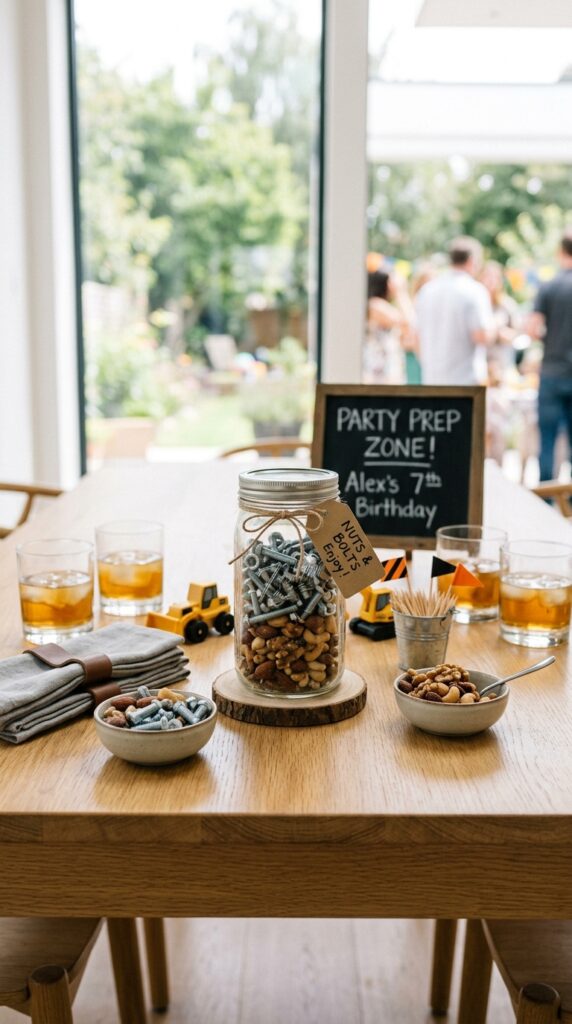
Filling a clear glass jar with plastic nuts and bolts creates a simple industrial centerpiece that communicates the construction theme without needing any elaborate setup. Transparency is the key here because the visible contents become a texture and design element all on their own.
Adding a small personalized label or birthday tag to the front of the jar ties it back to the celebration in a meaningful way. Surrounding it with mini toy tools finishes the look cleanly and confidently.